Hero (Dragon Quest XI): Difference between revisions
No edit summary |
Shy-Guy2002 (talk | contribs) |
||
| (37 intermediate revisions by 18 users not shown) | |||
| Line 1: | Line 1: | ||
{{Character | {{Character | ||
|Name=Hero | |Name=Hero | ||
|Game= | |Game={{Dragon Quest XI}} | ||
|Image=[[File:DQXI Hero art.png|220px]] | |Image=[[File:DQXI Hero art.png|220px]] | ||
|Sprite=[[File: | |Sprite=[[File:Hero XI sprite walk.gif]] | ||
|Japanese name=勇者 | |Japanese name=勇者 | ||
|Roumaji=Yuusha | |Roumaji=Yuusha | ||
|Title=Luminary | |Title=Luminary | ||
|Class= | |Class={{Hero V}} | ||
|Race=Human | |Race=[[Human]] | ||
|Age=16 | |Age=16 | ||
|Family= [[ | |Family=[[King Irwin]]† (father)<br>[[Queen Eleanor]]† (biological mother)<br> [[Amber]] (adoptive mother)<br>[[Chalky]]† (adoptive grandfather)<br>[[Rab]] (biological grandfather)<br>[[Erdwin]]† (ancestor)<br>[[Gemma]] (potential wife) | ||
|Voice Actor= [https://www.imdb.com/name/nm1727356/ Rasmus Hardiker] (English)<br>[ | |Voice Actor= [https://www.imdb.com/name/nm1727356/ Rasmus Hardiker] (English)<br>[[Mitsuki Saiga]] (Japanese, ''XI S'', ''Super Smash Bros.'') | ||
|}} | |}} | ||
The '''[[Hero]]''' of | The '''[[Hero]]''' of {{Dragon Quest XI}}, known as the '''Luminary''' within his story, is a young man from the sleepy village of Cobblestone. After participating in a coming-of-age ceremony, he finds out he is the reincarnation of an ancient Hero who once saved the world. On his 16th birthday, he sets out on his journey in order to fulfill his destiny. | ||
In ''[[Super Smash Bros. Ultimate]]'', the Luminary has been given the default name '''Eleven''' in order to differentiate him from the other three Heroes appearing in the game, following the naming convention seen in the promotional material of other games. | In ''[[Super Smash Bros. Ultimate]]'', the Luminary has been given the default name '''Eleven''' (イレブン) in order to differentiate him from the other three Heroes appearing in the game, following the naming convention seen in the promotional material of other games. | ||
==Appearance and | ==Appearance and Personality== | ||
He is a young man with blue eyes and dirty blond chin-length hair in a bob cut. On his left hand, he bears a mysterious mark that has appeared since the day he was born. The mark glows when the Luminary is in danger. He wears a long, sleeveless brown and purple leather tunic over a black long-sleeved shirt, brown trousers, and tan leather boots. Around his waist, he wears | He is a young man with round blue eyes and dirty blond chin-length hair in a bob cut. On his left hand, he bears a mysterious mark that has appeared since the day he was born. The mark glows when the Luminary is in danger. He wears a long, sleeveless brown and purple leather tunic over a black long-sleeved shirt, brown trousers, and tan geen leather boots. Around his waist, he wears a small bag the same colour, attached to a leather belt, that holds all his items. He carries a scabbard across his back; the one depicted in his character art is a [[Cobblestone sword]]. The Luminary's good looks and hair are commented on by various characters. | ||
Like the heroes before him, the Luminary is a silent protagonist. However, several different characters say various things that seem to acknowledge or imply a few personality traits. Like a handful of other heroes in the series, he seems to have a tendency to sleep in, which various party members will comment on. A mischievous streak is also acknowledged, as two flashbacks mention pranks that he played during his childhood. He is also kind-hearted and worries a lot about others. During the events of the second act, he is implied to have a more serious and grown-up demeanor, which carries over into the beginning of act three. Some yes/no options that the player is given do imply some sort of cheeky personality; however, it is mostly the dramatic reaction of the other characters that fuels this. | |||
In many lines of [[Party Chat|party talk]] dialogue and even one or two cutscenes, the party members (namely, [[Erik]]) make comments about the Hero that seem to imply quite a few different personality traits the latter may have. Below are a few examples. | |||
{{spoiler|start}}These are examples of Erik's party talk showcasing the Hero's personality: | |||
* After horse racing in [[Gallopolis]] for the first time and returning to the racetrack, Erik asks teasingly if he wants to enter another horse race, saying it seemed like he'd become quite the fan. | |||
* After [[Kainui]] tells the story of his late grandfather, [[Kainoa]], the Luminary is distressed about the prospect of telling [[Michelle]] that her spouse had died, especially with some of the party supporting telling her the truth and some of the party saying it was okay to lie. | |||
**Of note, in Erik's party talk, the Luminary asks him what ''he'' would tell her. | |||
**If the Luminary tells the truth, when the party helps the mermaid [[Michelle]] meet up with Kainui, Erik (in his party talk) notices that Luminary is worried about her being spotted by the angry fishermen. This worry is not shared by the others. | |||
* In act two party talk, Erik says to the Hero, "You should stop worrying about other people just for once and think about what's best for you". | |||
{{spoiler|end}} | |||
==Appearances== | ==Appearances== | ||
==={{DQ11}}=== | ==={{DQ11}}=== | ||
The Luminary is long-lost son of [[King Irwin]] and [[Queen | ====Story==== | ||
=====Act One===== | |||
{{spoiler|start}}The Luminary is the long-lost son of [[King Irwin]] and [[Queen Eleanor]], the late rulers of the fallen kingdom [[Dundrasil]]. He also is the grandson of [[Rab|Lord Robert]], the ex-king of Dundrasil and father of Queen Eleanor. The Hero's birth is heralded as the reincarnation of [[Erdwin]], the hero of legend and enemy of the fabled [[Calasmos|Dark One]]. However, the night of his birth also marked the fall of Dundrasil castle, where it was ambushed during an important meeting called the Colloquy of Kings - a summit of the four kings of [[Erdrea]] (King Irwin, ex-king Lord Robert, the [[Sultan of Gallopolis]], and the [[King of Sniflheim]]) to discuss the legend of the Luminary and what the prophecies surrounding him mean for the world. King Carnelian and Lord Robert fended off the monsters closest to the Council Chambers while King Irwin escaped with the baby Luminary. | |||
He found Queen Eleanor and [[Princess Jade]] of Heliodor, and made their way into a secret escape passage in the underground dungeons, but were spotted by a [[Barbatos]] and two [[Moosifer|moosifers]] just as they were about to leave. Irwin insisted Eleanor and Jade leave, and locked the door behind them when they left, leaving him to fend off the monsters. After the battle, Irwin heard echoes of King Carnelian from within the dungeons calling for Princess Jade, and ran towards the source of the calls. There, he saw King Carnelian being bound by dark tendrils belonging to none other than [[Mordegon]], before the sorcerer disppeared in a flash of purple smoke and the King dropped to the ground. Irwin ran up to King Carnelian, who asks him where the Queen and Princess are, and Irwin says that they made it safely out the castle. King Carnelian responds ominously that he would send forces out for them, and then swiftly stabs Irwin from the front. Irwin falls to the ground, defeated. Soon enough, [[Hendrik]] arrives at the scene, shocked at what he sees in front of him, and King Carnelian justifies his actions by saying that Irwin had "came at him in a frenzy" due to the great pressure of the Luminary's birth, which had also caused the end of countless lives and could only bring darkness into the world. King Carnelian, unbeknownst to Irwin and Hendrik, was actually possessed by Mordegon when he gave these orders, leaving Irwin there for the [[Gloomnivore]] to later feast on his despair. | |||
Meanwhile, Queen Eleanor and Princess Jade had been running in the forests of [[Dundrasil Region]], away from the castle and the [[Headless horseman||headless horsemen]] chasing them, through the ongoing thunderstorm. Queen Eleanor, sensing that it was a losing battle to keep running, hid Jade in a bush and gave the Luminary and his basket to her. The queen continued running, remaining as a decoy to buy Jade time after the monsters followed suit, and resulting in the queen's death. Though Jade is able to escape the castle grounds, she loses her footing and the Luminary, still in his basket, falls into gushing river rapids and then over a waterfall leading to the bottom of the [[Cobblestone Falls]]. By an unknown miracle (likely the power of the Luminary) the boy is unharmed and the next day the basket is found by [[Chalky]], a resident of the small village of [[Cobblestone]]. A letter explaining the Hero's heritage is enclosed in the basket.{{spoiler|end}} | |||
[[Chalky]], after finding the baby Luminary at the bottom of the [[Cobblestone Falls]], takes him in to raise him as his grandson. Chalky's daughter [[Amber]] assumes the role of his mother, and the Hero is raised as an ordinary boy in the village until his 16th birthday, where he undergoes the traditional coming-of-age rite of passage by climbing [[Cobblestone Tor]], with his childhood friend [[Gemma]] who was born on the day he was found. When reaching the top of the mountain to complete the ceremony, Gemma is attacked by a [[Hades condor]] and the Hero's Luminary powers awaken in order to save her, casting an ambiguous spell of the [[zap]] line that strikes down the monster, and the entire village sees the lightning from the bottom of the Tor. When the duo make it home safely, the truth is revealed by Amber that he is the reincarnation of the Luminary and he is instructed to depart for Heliodor and search for an audience with the [[King Carnelian|King]] to learn more of his destiny. She gives then gives him the [[precious pendant]] Important Item, which will apparently prove his status as the Luminary. | |||
That night, the Hero can't sleep, and wakes up in the dead of night to go take a walk in the village. There, he sees Gemma underneath the tree they used to play under, and she reminisces on their past before saying a goodbye and running away crying. When he leaves for Heliodor the following morning, he is gifted Cobblestone's finest [[Horse and monster riding|horse]], and Gemma gives him a hand-made [[Gemma's charm]] gift accessory as good luck. She asks him to not forget any of them on his adventure, and with that he leaves. | |||
{{spoiler|start}}When he arrives at Heliodor city and walks to the castle, he is stopped by two guards, which laugh at him incredulously when he tells them he is the Luminary. However, when he shows them the [[precious pendant]] Amber had entrusted him with, the guards falter and one of them runs off to presumably talk to the King. When he comes back, the Hero is allowed entry. Talking to various NPCs in the castle reveal that the arrival of the Luminary had postponed several other audiences with the King, to the NPCs' dismay. When the Hero finally meets the King - who is accompanied by various soldiers and his two right-hand-men, [[Hendrik]] and [[Jasper]] - the King asks for his name and where he came from. He then sends Jasper and half of the soldiers to Cobblestone; unbeknownst to the Hero, this was to destroy the city and slaughter its residents. Afterwards, the King - still possessed by [[Mordegon]] from sixteen years and approximately two days ago - proclaims that the Luminary is in fact the "Darkspawn", who will bring ruin to the world if left unopposed. The Luminary is then captured by Hendrik and the remaining soldiers, and thrown into the deepest corner of the [[Heliodor Dungeons|dungeons]] to await his execution in two days ("before the sun has set three times"), which should be by the time Jasper returns from the "investigation". | |||
After Hendrik leaves, the Luminary makes a ruckus, provoking the [[Erik|mysterious hooded man]] in the cell opposite him. He lets down his guard when the Hero tells him he was imprisoned for being the Luminary, and mumbles something about the prophecy [[The Seer|a prophet]] gave them before agreeing to help him escape through the [[Heliodor Sewers|sewers]]. They escape together, being pursued by guards and also at some point a [[black dragon]], before being cornered on a cliff. There, the two exchange glances, and the man lifts his hood to reveal his face and his name, [[Erik]]. They jump off the cliff and survive unharmed at the bottom of the [[Heliodorian Foothills]], due to the power of the Luminary. Their daring escape puts the two of them at the top of the wanted list in Heliodor, although Erik's presence as a dangerous criminal diminishes througout the story as the Heliodorian guards prioritise the capture of the Hero instead. | |||
After making their way to Cobblestone following a few more events, the Hero is flung into an involuntary "vision" from the [[Yggdrasil root]] wrapped around the big tree, and for a while he roams around in the past. His grandfather is alive again, and the Hero tells him all that has happened. Chalky is shocked, and says that he would bury a message in the three-sided rock at Cobblestone Falls. The "vision" ends shortly after the Hero walks back to the tree, and the Hero sees that the village is actually destroyed. The Hero and Erik then walk to the Cobblestone Falls, where the Hero unearths a small box buried in front of the aforementioned rock, and reads the two messages inside. One is a message a message from Queen Eleanor, saying for the Luminary to seek out King Carnelian when he is of age to find out more about his ancestry; the other is from Chalky himself, apologising for all that has happened and telling him to use the enclosed [[Keystone]] at the [[Emerald Coast|Door of Departure]], to explore the world and also to find out more about himself. | |||
There, they are caught by Hendrik and Heliodorian soldiers on horseback. After a tight escape through a teleportal shrine in the Door of Departure that leads them to the small town [[Hotto]], the duo encounter the diminutive sorceress {{Veronica 11}} who identifies the Luminary immediately and coerces him into helping rescue her hapless sister {{Serena 11}} from a band of {{MFamilies}}s. Upon the successful rescue, the sisters reveal themselves to be the Keepers, magic users from the city of [[Arboria]] who have sworn an oath to keep the Luminary safe at all costs, and join the {{Party 11}}. The group sets out on a mission to reach [[Yggdrasil]], wandering around to find out how they can do so, first stopping at [[Gallopolis]] and aiding the [[Prince Faris|witless prince]] while the flamboyant [[Sylvando]] insists upon joining the mission. They travel to [[Gondolia]] to board the Salty Stallion (Sylvando's [[ship]]) in search of a wandering trader that bought the [[Rainbough]] from the [[Sultan of Gallopolis]] - as the Rainbough seemed to be an enchanted branch of Yggdrasil, the party had no choice to follow this lead. There, they encounter Jasper, but they narrowly escape his grasp by jumping off a ledge onto the ship. | |||
From there, the party departs for [[Octagonia]], where they learn that the prize for winning the city's mixed martial arts tournament is the Rainbough itself. Entering the tournament, the Luminary is allied with the local orphanage caretaker, continuous winner of the MMA and fighting superstar [[Vince Vanquish]]. They fight their way to the semi-finals, where the Luminary properly meets Jade and Rab for the first time in sixteen years, although they do not recognise him until the Hero guards with his arms crossed and the two recognise the mark on his hand. After resolving [[Arachtagon|sudden various events]], which had caused a delay in the awards ceremony, the Hero and Vince have one last duel to see who keeps the prize instead of selling it and splitting the [[gold]]. The Hero wins easily (due to the aforementioned [[Arachtagon|various events]]) and is about to bag the Rainbough when one of the staff members says that the prize was stolen. The note left behind said for the Hero to meet the thieves at the [[Dundrasil|Dundrasil ruins]], signed by none other than Rab. It is there where the two explain their history with the Luminary, reveal the truth of Dundrasil's fall, perform a ceremony and then are ambushed by Hendrik and his soldiers. A chain of events leaves Jade and the Hero separated from the rest of the party, and the Hero ends up falling off a cliff. Jade dives off to stay with him, still tormented by her inability to hold on to the Luminary on the day Dundrasil fell, and they fall into the water together. They survive, presumably due to the power of the Luminary. After they meet up with the others again, Rab gives them the Rainbough as their rightful prize, which shows them a vision of an altar in the [[First Forest]]. Seemingly, the party needs to assemble [[Six Orbs|six rainbow orbs]] that will grant them access to Yggdrasil through a rainbow pathway. Luckily, Erik was already in possession of the [[Red Orb]] and Rab and Jade were in possession of the [[Yellow Orb]] from the second-place tournament prize. The party then travels to [[Lonalulu]] (and [[Nautica]]) for the [[Green Orb]], [[The Eerie Eyrie]] for the [[Silver Orb]], [[Zwaardsrust]] for the [[Purple Orb]] and [[Sniflheim]] for the [[Blue Orb]], before heading to the city of Arboria and ascending to Yggdrasil herself. | |||
Reaching the heart of the tree, the Luminary is about to retrieve the [[Super Sword of Light]] inside the heart, but is ambushed by Jasper, holding one of the six orbs to channel dark magic into him. This barrier of darkness prevents any and all damage, so he swiftly defeats the party. Hendrik and King Carnelian catch up to Jasper after the battle, but before Hendrik can do anything about Jasper's seemingly sudden traitorism, Mordegon exists Carnelian's body and sucks the power of the Luminary out of the Hero's body, temporarily borrowing it to allow him access to the heart. He reaches inside and grabs the Sword of Light, corrupting it into the [[Sword of Shadows]] before plunging it into the ground and sucking the life force out of Yggrasil. Veronica, desperate and using the last of her strength, zooms the other unconscious party members (and Hendrik) to various corners of the world, before Yggdrasil falls from the sky, marking the beginning of Act Two.{{spoiler|end}} | |||
=====Act Two===== | |||
{{spoiler|start}}Several months pass, and the Luminary awakens in the form of a fish in Nautica. [[Queen Marina]] had used her magic to transform him into this state to hide him from Mordegon. She briefly channels her special seeing pearl to show him the state of the world. However, time is of the essence, as Nautica is being besieged by one of Mordegon's [[Spectral Sentinels]], [[Alizarin]], and the Hero is blown to the surface by the Queen. The Luminary is fished up by [[Blue John]], a local fisherman on the [[Emerald Coast]]. He makes his way to the ruins of Cobblestone, and finds the village has been turned into what the people call the [[Last Bastion]], a shelter for refugees fleeing Mordegon's forces, ran by Hendrik and King Carnelian. Eventually, the Luminary assaults the occupied Heliodor castle and kills the [[Spectral Sentinel]] [[Tyriant]] to restore light to the land and reclaims the [[Purple Orb]] from his hands. With the first blow against Mordegon's dominion over the world, the Luminary and Hendrik set out to reassemble the party and confront Mordegon. The death of Mordegon and the credits scene that follows marks the beginning of the postgame. | |||
At the Crucible in [[Mount Huji]], after the player has obtained the [[Forging Hammer]], [[Rareified Orichalcum]] and completed the events in [[Hotto]], the player can forge a new [[Sword of Light]] which allows the Luminary to penetrate the barrier surrounding the [[Fortress of Fear]] floating in the sky in place of Yggdrasil. Riding on the back of mythical whale [[Cetacea]], the Luminary is able to channel the power of the Sword of Light and allow access into the Fortress, where they eventually defeat Mordegon.{{spoiler|end}} | |||
=====Postgame===== | |||
{{spoiler|start}}The Hero [[time travel|travels back in time]] to before the party goes up to Yggdrasil, in an attempt to save the world. He shatters the [[Sword of Light]] on the Time Sphere in the [[Tower of Lost Time]] to go back in time, but is able to keep the Sword of Shadows. At the heart of Yggdrasil, he intercepts Jasper's ambush, and is able to break down his dark magic with the Sword of Shadows. The party is able to defeat him swiftly. When Hendrik and King Carnelian catch up, the King invites the party to his castle for a celebration after revealing the traitorous Jasper and uncovering "his" wicked scheme. The Hero then takes the [[Super Sword of Light]] from the heart and the party goes to Heliodor castle, where the Hero is reunited with the people of Cobblestone who had been thrown in the dungeons. | |||
That night, the party is invited to stay over at the castle, and the Hero gets his own room - however, in the dead of night, King Carnelian attempts to take the Super Sword of Light from him. A [[Calasmos]] strange force]] repels him, and he grunts in pain as the sword clatters to the ground. This wakes up the Hero, and the commotion also wakes up just about everyone else in the castle. The other party members (and Hendrik) burst into the room, and the King disappears in a puff of purple magic. They confront him in the Throne Room, where Mordegon finally reveals himself. When they defeat him, Mordegon notices the presence of a [[Calasmos|dark]] [[Tockle|presence]] at the Hero's feet, and comments smugly that the Hero is not the only one who has defied the flow of time, before vanishing into dust. The next day, King Carnelian - purged of the control of Mordegon, holds an award ceremony for the Luminary. However, midway through the ceremony, rumbling is heard from above, and the party rushes out to the balcony to see [[Erdwin's Lantern]] fall from the sky, marking the rebirth of [[Calasmos]]. The party then sets out on a mission to find out how to defeat him, witnessing memories of long past through [[Yggdrasil seedlings]] after some guidance from the Elder [[Eegoltap]] in [[Havens Above]], who also [[Earthsplitter|grants]] [[Blightsplitter|the]] [[Brightsplitter|Luminary]] [[Flamesplitter|various]] [[Seasplitter|new]] [[Skysplitter|-splitter]] skills. After watching three memories from the saplings, the party finds out the truth about [[Erdwin|the]] [[Serenica|Heroes]] [[Morcant|of]] [[Drustan|Legend]], namely the truth behind Erdwin's disappearance and the truth behind Mordegon's true identity. The party can then return to Havens Above to obtain the [[Wheel of Time]] and access the [[Tower of Lost Time]], where the [[Timekeeper]] will help Veronica and Serena cast a spell to re-armour Cetacea and allow her to break the dark barrier of the Dark Star where Calasmos is gathering. | |||
If the player so chooses, the party can undergo the trials in [[Drustan's Labyrinth]], and one of the wishes the Luminary can be granted for successful completion is to "live with somebody forever and ever!". in which he can select out of the party members and also Gemma. THe Hero will then live with the selected companion in his house in Cobblestone, if it is rebuilt. If the player chooses Gemma, the Hero and Gemma are canonically married. | |||
After defeating Calasmos, the party returns to the Tower of Lost Time, and the Hero temporarily transfers his Luminary powers to The Timekeeper, who transforms back into [[Serenica]]. He gives her the Super Sword of Light, which she uses to shatter the Time Sphere, though this time it does not break and the Hero collects it from the floor after she returns to the past. Afterwards, the Hero returns to Cobblestone for an unspecified period of time. Veronica and Serena wil then visit, and the three of them will travel back to Yggdrasil to return the Super Sword of Light back to the heart of Yggdrasil, and there they encounter the [[Yggdragon]]. She bestows upon him the title of [[Erdrick]] before the story ends. | |||
{{spoiler|end}} | |||
====Base stats & | ====Base stats & pep bonus==== | ||
{| style="width:55%; height:100px; text-align:center" border="1" | {| style="width:55%; height:100px; text-align:center" border="1" | ||
|-<---!Headings are up first.!---> style="font-weight:bold; background:#cc00ff" | |-<---!Headings are up first.!---> style="font-weight:bold; background:#cc00ff" | ||
| Attribute || Starting Stats || Maximum Stats | | Attribute || Starting Stats || Maximum Stats || Skills | ||
|- style="font-weight:normal" | |- style="font-weight:normal" | ||
| Level || 1 || 99 | | Level || 1 || 99 || - | ||
|- | |- | ||
| HP || 22 || 750 | | HP || 22 || 750 || +20 | ||
|- | |- | ||
| MP || 0 || 460 | | MP || 0 || 460 || +20 | ||
|- | |- | ||
| Strength || 8 || 380 | | Strength || 8 || 380 || +75 | ||
|- | |- | ||
| Agility || 6 || 350 | | Agility || 6 || 350 || +10 | ||
|- | |- | ||
| Resilience || 6 || 220 | | Resilience || 6 || 220 || +10 | ||
|- | |- | ||
| Magical Might || 5 || 350 | | Magical Might || 5 || 350 || +55 | ||
|- | |- | ||
| Magical Mending || 3 || 330 | | Magical Mending || 3 || 330 || +50 | ||
|- | |- | ||
| Deftness || 5 || 200 | | Deftness || 5 || 200 || +10 | ||
|- | |- | ||
| Charm || 4 || 250 | | Charm || 4 || 250 || +40 | ||
|- | |- | ||
| Initial gear ||colspan= | | Initial gear ||colspan=3|[[Cobblestone sword]], [[Plain clothes]]<br>[[Cobblestone greatsword]] (in inventory) | ||
|- | |- | ||
| Pep boost ||colspan= | | [[Pep]] boost ||colspan=3|Strength +20% (40%), resilience +20% (40%)<br>Critical rate up (critical rate further increased)<br>Parenthesis accounts for pep-up power-up bonuses. | ||
|} | |} | ||
*The Luminary also possesses a minor resistance to being [[cursed]]. | *The Luminary also possesses a minor resistance to being [[cursed]]. | ||
====Spells==== | ====Spells==== | ||
| Line 78: | Line 108: | ||
|2 | |2 | ||
|One enemy | |One enemy | ||
| | |Up to 34~38 fire damage at 150 magical might | ||
|- style="font-weight:normal" | |- style="font-weight:normal" | ||
!bgcolor="#A1A1A1"|[[Heal]] | !bgcolor="#A1A1A1"|[[Heal]] | ||
| Line 90: | Line 120: | ||
|3 | |3 | ||
|Enemy group | |Enemy group | ||
| | |Up to 28~36 fire damage at 132 magical might | ||
|- style="font-weight:normal" | |- style="font-weight:normal" | ||
!bgcolor="#A1A1A1"|[[Evac]] | !bgcolor="#A1A1A1"|[[Evac]] | ||
| Line 102: | Line 132: | ||
|6 | |6 | ||
|All enemies | |All enemies | ||
| | |Up to 44~52 light damage at 195 magical might | ||
|- style="font-weight:normal" | |- style="font-weight:normal" | ||
!bgcolor="#A1A1A1"|[[Snooze]] | !bgcolor="#A1A1A1"|[[Snooze]] | ||
| Line 120: | Line 150: | ||
|7 | |7 | ||
|Enemy group | |Enemy group | ||
| | |Up to 82~90 fire damage at 227 magical might | ||
|- style="font-weight:normal" | |- style="font-weight:normal" | ||
!bgcolor="#A1A1A1"|[[Frizzle]] | !bgcolor="#A1A1A1"|[[Frizzle]] | ||
| Line 126: | Line 156: | ||
|8 | |8 | ||
|One enemy | |One enemy | ||
| | |Up to 106~122 fire damage at 287 magical might | ||
|- style="font-weight:normal" | |- style="font-weight:normal" | ||
!bgcolor="#A1A1A1"|[[Zing]] | !bgcolor="#A1A1A1"|[[Zing]] | ||
| Line 144: | Line 174: | ||
|12 | |12 | ||
|All enemies | |All enemies | ||
| | |Up to 140~148 light damage at 304 magical might | ||
|- style="font-weight:normal" | |- style="font-weight:normal" | ||
!bgcolor="#A1A1A1"|[[Kasnooze]] | !bgcolor="#A1A1A1"|[[Kasnooze]] | ||
| Line 156: | Line 186: | ||
|16 | |16 | ||
|Enemy group | |Enemy group | ||
| | |Up to 216~232 fire damage at 362 magical might | ||
|- style="font-weight:normal" | |- style="font-weight:normal" | ||
!bgcolor="#A1A1A1"|[[Kafrizz]] | !bgcolor="#A1A1A1"|[[Kafrizz]] | ||
| Line 162: | Line 192: | ||
|21 | |21 | ||
|One enemy | |One enemy | ||
| | |Up to 307~331 fire damage at 344 magical might | ||
|- style="font-weight:normal" | |- style="font-weight:normal" | ||
!bgcolor="#A1A1A1"|[[Kazing]] | !bgcolor="#A1A1A1"|[[Kazing]] | ||
| Line 187: | Line 217: | ||
|Up to 330~390 non-elemental damage | |Up to 330~390 non-elemental damage | ||
|- style="font-weight:normal" | |- style="font-weight:normal" | ||
!bgcolor="#A1A1A1"|[[ | !bgcolor="#A1A1A1"|[[Blightsplitter]] | ||
|16 | |16 | ||
|All enemies | |All enemies | ||
|Up to 210~250 | |Up to 210~250 darkness damage | ||
|- style="font-weight:normal" | |- style="font-weight:normal" | ||
!bgcolor="#A1A1A1"|[[ | !bgcolor="#A1A1A1"|[[Brightsplitter]] | ||
|16 | |16 | ||
|All enemies | |All enemies | ||
|Up to 210~250 | |Up to 210~250 light damage | ||
|- style="font-weight:normal" | |- style="font-weight:normal" | ||
!bgcolor="#A1A1A1"|[[ | !bgcolor="#A1A1A1"|[[Earthsplitter (skill)|Earthsplitter]] | ||
|16 | |16 | ||
|All enemies | |All enemies | ||
|Up to 210~250 | |Up to 210~250 earth damage | ||
|- style="font-weight:normal" | |- style="font-weight:normal" | ||
!bgcolor="#A1A1A1"|[[ | !bgcolor="#A1A1A1"|[[Flamesplitter]] | ||
|16 | |16 | ||
|All enemies | |All enemies | ||
|Up to 210~250 | |Up to 210~250 fire damage | ||
|- style="font-weight:normal" | |- style="font-weight:normal" | ||
!bgcolor="#A1A1A1"|[[ | !bgcolor="#A1A1A1"|[[Seasplitter]] | ||
|16 | |16 | ||
|All enemies | |All enemies | ||
|Up to 210~250 | |Up to 210~250 ice damage | ||
|- style="font-weight:normal" | |- style="font-weight:normal" | ||
!bgcolor="#A1A1A1"|[[ | !bgcolor="#A1A1A1"|[[Skysplitter]] | ||
|16 | |16 | ||
|All enemies | |All enemies | ||
|Up to 210~250 | |Up to 210~250 wind damage | ||
|} | |} | ||
*'''NOTE:''' the | *'''NOTE:''' the Luminary must be equipped with the Sword of Light or one of its reforged forms to use the -splitter skills. Completing quest #60 raises the base damage to 200~240 and the maximum to 400~440. | ||
====Character builder==== | ====Character builder==== | ||
| Line 235: | Line 265: | ||
| One enemy | | One enemy | ||
| Yes | | Yes | ||
| | | Yes | ||
| 120% (plus 5) fire damage | | 120% (plus 5) fire damage | ||
|- | |- | ||
| Line 322: | Line 352: | ||
|width="50%" valign="top" style="background:#4682B4"|'''<font color="#ffffff">Info</font>''' | |width="50%" valign="top" style="background:#4682B4"|'''<font color="#ffffff">Info</font>''' | ||
|- | |- | ||
!bgcolor="#fa8072"|Greatsword Guard | !bgcolor="#fa8072"|[[Greatsword Guard]] | ||
|3 | |3 | ||
|2 | |2 | ||
| Line 370: | Line 400: | ||
|Up to 130~140 ice damage to a group of enemies, 25% chance to stun each, stun rate is dependent on enemy resistance | |Up to 130~140 ice damage to a group of enemies, 25% chance to stun each, stun rate is dependent on enemy resistance | ||
|- | |- | ||
!bgcolor="#fa8072"|Cutting Edge | !bgcolor="#fa8072"|[[Cutting Edge]] | ||
|10 | |10 | ||
|8 | |8 | ||
| Line 389: | Line 419: | ||
| 16 | | 16 | ||
|16 | |16 | ||
|One | |One enemy | ||
|Yes | |Yes | ||
|Yes | |Yes | ||
| Line 442: | Line 472: | ||
| One enemy | | One enemy | ||
|Yes | |Yes | ||
| | |All hits | ||
| | |Attacks one enemy twice, each hit does full damage. | ||
|- | |- | ||
!bgcolor="#fa8072"|[[Sword Dance]] | !bgcolor="#fa8072"|[[Sword Dance]] | ||
| Line 458: | Line 488: | ||
| All enemies | | All enemies | ||
| Yes | | Yes | ||
| | |No | ||
|Up to 210~250 lightning damage | |Up to 210~250 lightning damage. Must be equipped with a sword to use. | ||
|- | |- | ||
!bgcolor="#fa8072"|[[Gigasmash]] | !bgcolor="#fa8072"|[[Gigasmash]] | ||
| Line 466: | Line 496: | ||
| One group | | One group | ||
| Yes | | Yes | ||
| | |No | ||
|Up to 250~270 lightning damage | |Up to 250~270 lightning damage. Must be equipped with a greatsword to use. | ||
|- | |- | ||
!bgcolor="#fa8072"|[[Blade of Ultimate Power]] | !bgcolor="#fa8072"|[[Blade of Ultimate Power]] | ||
| Line 474: | Line 504: | ||
| One enemy | | One enemy | ||
| Yes | | Yes | ||
| | |No | ||
|Up to 680~720 non-elemental damage to one enemy | |Up to 680~720 non-elemental damage to one enemy | ||
|- | |- | ||
!bgcolor="#fa8072"|Gigacrash | !bgcolor="#fa8072"|[[Gigacrash]] | ||
|36 | |36 | ||
|32 | |32 | ||
| One group | | One group | ||
| Yes | | Yes | ||
| | |No | ||
|Up to 440~460 lightning damage | |Up to 440~460 lightning damage. Must be equipped with a greatsword to use. | ||
|- | |- | ||
!bgcolor="#fa8072"|[[Gigagash]] | !bgcolor="#fa8072"|[[Gigagash]] | ||
| Line 490: | Line 520: | ||
| All enemies | | All enemies | ||
| Yes | | Yes | ||
| | |No | ||
|Up to 390~430 lightning damage | |Up to 390~430 lightning damage. Must be equipped with a sword to use. | ||
|- | |- | ||
|} | |} | ||
| Line 567: | Line 597: | ||
| No | | No | ||
| -- | | -- | ||
|Up to 131~141 lightning damage | |Up to 131~141 lightning damage at 161 magical might | ||
|- | |- | ||
!bgcolor="#fa8072"|Charm +40 | !bgcolor="#fa8072"|Charm +40 | ||
| Line 623: | Line 653: | ||
| No | | No | ||
| -- | | -- | ||
|Up to 314~344 lightning damage | |Up to 314~344 lightning damage at 244 magical might | ||
|- | |- | ||
!bgcolor="#fa8072"|Magical Mending +50 | !bgcolor="#fa8072"|Magical Mending +50 | ||
| Line 663: | Line 693: | ||
| No | | No | ||
| -- | | -- | ||
|Up to 695~745 lightning damage to a group of enemies | |Up to 695~745 lightning damage to a group of enemies at 350 magical might | ||
|- | |- | ||
!bgcolor="#fa8072"|[[Omniheal]] | !bgcolor="#fa8072"|[[Omniheal]] | ||
| Line 671: | Line 701: | ||
| No | | No | ||
| -- | | -- | ||
| | |Fully restores all party members' HP. | ||
|- | |- | ||
!bgcolor="#fa8072"|Pep Chance +10% | !bgcolor="#fa8072"|Pep Chance +10% | ||
| Line 698: | Line 728: | ||
|- | |- | ||
|} | |} | ||
====Equipment==== | |||
{{VersionTabs|Weapons|{{CharacterEquipmentList|header|title=Dragon Quest XI|subtitle=S: Deffinitive Edition|equipmentType=Weapon}} | |||
{{CharacterEquipmentList|entry|item=[[Cypress stick]]|statModifier=Attack +7}} | |||
{{CharacterEquipmentList|entry|item=[[Cobblestone sword]]|statModifier=Attack +8}} | |||
{{CharacterEquipmentList|entry|item=[[Soldier's sword]]|statModifier=Attack +9}} | |||
{{CharacterEquipmentList|entry|item=[[Cobblestone greatsword]]|statModifier=Attack +12}} | |||
{{CharacterEquipmentList|entry|item=[[Copper sword]]|statModifier=Attack +13}} | |||
{{CharacterEquipmentList|entry|item=[[Copper chopper]]|statModifier=Attack +15}} | |||
{{CharacterEquipmentList|entry|item=[[Bronze sword]]|statModifier=Attack +16}} | |||
{{CharacterEquipmentList|entry|item=[[Broad sword]]|statModifier=Attack +20}} | |||
{{CharacterEquipmentList|entry|item=[[Iron broadsword]]|statModifier=Attack +20}} | |||
{{CharacterEquipmentList|entry|item=[[Rapier]]|statModifier=Attack +24}} | |||
{{CharacterEquipmentList|entry|item=[[Cast-iron claymore]]|statModifier=Attack +28}} | |||
{{CharacterEquipmentList|entry|item=[[Bandit blade]]|statModifier=Attack +30}} | |||
{{CharacterEquipmentList|entry|item=[[Silver rapier]]|statModifier=Attack +32}} | |||
{{CharacterEquipmentList|entry|item=[[Steel broadsword]]|statModifier=Attack +35}} | |||
{{CharacterEquipmentList|entry|item=[[Cautery sword]]|statModifier=Attack +42}} | |||
{{CharacterEquipmentList|entry|item=[[Broader sword]]|statModifier=Attack +43}} | |||
{{CharacterEquipmentList|entry|item=[[Falcon blade]]|statModifier=Attack +45}} | |||
{{CharacterEquipmentList|entry|item=[[Black blade]]|statModifier=Attack +49}} | |||
{{CharacterEquipmentList|entry|item=[[Zombiesbane]]|statModifier=Attack +54}} | |||
{{CharacterEquipmentList|entry|item=[[Platinum sword]]|statModifier=Attack +60}} | |||
{{CharacterEquipmentList|entry|item=[[Bastard sword]]|statModifier=Attack +61}} | |||
{{CharacterEquipmentList|entry|item=[[Heliodorian sword]]|statModifier=Attack +61}} | |||
{{CharacterEquipmentList|entry|item=[[Zombie slayer]]|statModifier=Attack +65}} | |||
{{CharacterEquipmentList|entry|item=[[Aurora blade]]|statModifier=Attack +70}} | |||
{{CharacterEquipmentList|entry|item=[[Dragonsbane]]|statModifier=Attack +72}} | |||
{{CharacterEquipmentList|entry|item=[[Carbon steel claymore]]|statModifier=Attack +78}} | |||
{{CharacterEquipmentList|entry|item=[[Fizzle foil]]|statModifier=Attack +80}} | |||
{{CharacterEquipmentList|entry|item=[[Miracle sword]]|statModifier=Attack +80}} | |||
{{CharacterEquipmentList|entry|item=[[Metal slime sword]]|statModifier=Attack +84}} | |||
{{CharacterEquipmentList|entry|item=[[Fire blade]]|statModifier=Attack +87}} | |||
{{CharacterEquipmentList|entry|item=[[Banishing blade]]|statModifier=Attack +91}} | |||
{{CharacterEquipmentList|entry|item=[[Hendrik's greatsword]]|statModifier=Attack +91}} | |||
{{CharacterEquipmentList|entry|item=[[Liquid metal sword]]|statModifier=Attack +93}} | |||
{{CharacterEquipmentList|entry|item=[[Razer-wing]]|statModifier=Attack +93}} | |||
{{CharacterEquipmentList|entry|item=[[Über falcon blade]]|statModifier=Attack +94}} | |||
{{CharacterEquipmentList|entry|item=[[Dragon slayer]]|statModifier=Attack +96}} | |||
{{CharacterEquipmentList|entry|item=[[Stardust sword]]|statModifier=Attack +96}} | |||
{{CharacterEquipmentList|entry|item=[[Platinum powersword]]|statModifier=Attack +108}} | |||
{{CharacterEquipmentList|entry|item=[[Sword of light]]|statModifier=Attack +109}} | |||
{{CharacterEquipmentList|entry|item=[[Inferno blade]]|statModifier=Attack +111}} | |||
{{CharacterEquipmentList|entry|item=[[Thunderstorm sword]]|statModifier=Attack +111}} | |||
{{CharacterEquipmentList|entry|item=[[Nightcleaver]]|statModifier=Attack +115}} | |||
{{CharacterEquipmentList|entry|item=[[Sword of Kings]]|statModifier=Attack +120}} | |||
{{CharacterEquipmentList|entry|item=[[Nebula sword]]|statModifier=Attack +123}} | |||
{{CharacterEquipmentList|entry|item=[[Demonsbane]]|statModifier=Attack +124}} | |||
{{CharacterEquipmentList|entry|item=[[Wyrmfang]]|statModifier=Attack +131}} | |||
{{CharacterEquipmentList|entry|item=[[Über miracle sword]]|statModifier=Attack +135}} | |||
{{CharacterEquipmentList|entry|item=[[Lord's sword]]|statModifier=Attack +144}} | |||
{{CharacterEquipmentList|entry|item=[[Brimstone blade]]|statModifier=Attack +145}} | |||
{{CharacterEquipmentList|entry|item=[[Supernova sword]]|statModifier=Attack +147}} | |||
{{CharacterEquipmentList|entry|item=[[Sword of judgement]]|statModifier=Attack +150}} | |||
{{CharacterEquipmentList|entry|item=[[Metal gooreatsword]]|statModifier=Attack +151}} | |||
{{CharacterEquipmentList|entry|item=[[Super sword of light]]|statModifier=Attack +151}} | |||
{{CharacterEquipmentList|entry|item=[[Supreme sword of light]]|statModifier=Attack +151}} | |||
{{CharacterEquipmentList|entry|item=[[Shamshir of light]]|statModifier=Attack +158}} | |||
{{CharacterEquipmentList|entry|item=[[Metal king sword]]|statModifier=Attack +161}} | |||
{{CharacterEquipmentList|entry|item=[[Liquid metal gooreatsword]]|statModifier=Attack +167}} | |||
{{CharacterEquipmentList|entry|item=[[Hypernova sword]]|statModifier=Attack +182}} | |||
{{CharacterEquipmentList|entry|item=[[Sword of shadows]]|statModifier=Attack +196}} | |||
{{CharacterEquipmentList|entry|item=[[Skysteed sword]]|statModifier=Attack +199}} | |||
{{CharacterEquipmentList|entry|item=[[Legate's blade]]|statModifier=Attack +243}} | |||
{{CharacterEquipmentList|entry|item=[[Berserker's blade]]|statModifier=Attack +277}} | |||
{{CharacterEquipmentList|entry|item=[[Metal king gooreatsword]]|statModifier=Attack +285}} | |||
{{CharacterEquipmentList|entry|item=[[Brilliant blade]]|statModifier=Attack +327}} | |||
{{CharacterEquipmentList|note|text=}} | |||
{{CharacterEquipmentList|footer}}|Helmets| | |||
{{CharacterEquipmentList|header|title=Dragon Quest XI|subtitle=S: Definitive Edition|equipmentType=Helmet}} | |||
{{CharacterEquipmentList|entry|item=[[Bandana]]|statModifier=Defense +1}} | |||
{{CharacterEquipmentList|entry|item=[[Trodain bandana]]|statModifier=Defense +1}} | |||
{{CharacterEquipmentList|entry|item=[[Leather hat]]|statModifier=Defense +3}} | |||
{{CharacterEquipmentList|entry|item=[[Pointy hat]]|statModifier=Defense +5}} | |||
{{CharacterEquipmentList|entry|item=[[Feathered cap]]|statModifier=Defense +8}} | |||
{{CharacterEquipmentList|entry|item=[[Turban]]|statModifier=Defense +12}} | |||
{{CharacterEquipmentList|entry|item=[[Stone hardhat]]|statModifier=Defense +15}} | |||
{{CharacterEquipmentList|entry|item=[[Iron helmet]]|statModifier=Defense +16}} | |||
{{CharacterEquipmentList|entry|item=[[Fur hood]]|statModifier=Defense +18}} | |||
{{CharacterEquipmentList|entry|item=[[Bronze helmet]]|statModifier=Defense +18}} | |||
{{CharacterEquipmentList|entry|item=[[Malleable mask]]|statModifier=Defense +19}} | |||
{{CharacterEquipmentList|entry|item=[[Hermes' hat]]|statModifier=Defense +20}} | |||
{{CharacterEquipmentList|entry|item=[[Mercury's bandana]]|statModifier=Defense +23}} | |||
{{CharacterEquipmentList|entry|item=[[Iron mask]]|statModifier=Defense +25}} | |||
{{CharacterEquipmentList|entry|item=[[Steel helmet]]|statModifier=Defense +25}} | |||
{{CharacterEquipmentList|entry|item=[[Drasilian helm]]|statModifier=Defense +28}} | |||
{{CharacterEquipmentList|entry|item=[[Happy hat]]|statModifier=Defense +31}} | |||
{{CharacterEquipmentList|entry|item=[[Iron headgear]]|statModifier=Defense +32}} | |||
{{CharacterEquipmentList|entry|item=[[Papillon mask]]|statModifier=Defense +33}} | |||
{{CharacterEquipmentList|entry|item=[[Warrior's helm]]|statModifier=Defense +35}} | |||
{{CharacterEquipmentList|entry|item=[[Platinum headgear]]|statModifier=Defense +36}} | |||
{{CharacterEquipmentList|entry|item=[[Hades' helm]]|statModifier=Defense +37}} | |||
{{CharacterEquipmentList|entry|item=[[Thinking cap]]|statModifier=Defense +38}} | |||
{{CharacterEquipmentList|entry|item=[[Mythril helm]]|statModifier=Defense +38}} | |||
{{CharacterEquipmentList|entry|item=[[Metal slime helm]]|statModifier=Defense +39}} | |||
{{CharacterEquipmentList|entry|item=[[Dragon bandana]]|statModifier=Defense +41}} | |||
{{CharacterEquipmentList|entry|item=[[Raging bull helm]]|statModifier=Defense +42}} | |||
{{CharacterEquipmentList|entry|item=[[Great helm]]|statModifier=Defense +46}} | |||
{{CharacterEquipmentList|entry|item=[[Liquid metal helm]]|statModifier=Defense +49}} | |||
{{CharacterEquipmentList|entry|item=[[Autumn shower hat]]|statModifier=Defense +51}} | |||
{{CharacterEquipmentList|entry|item=[[Spring breeze hat]]|statModifier=Defense +51}} | |||
{{CharacterEquipmentList|entry|item=[[Summer cloud hat]]|statModifier=Defense +51}} | |||
{{CharacterEquipmentList|entry|item=[[Phantom mask]]|statModifier=Defense +51}} | |||
{{CharacterEquipmentList|entry|item=[[Winter sky hat]]|statModifier=Defense +51}} | |||
{{CharacterEquipmentList|entry|item=[[Irwin's helm]]|statModifier=Defense +52}} | |||
{{CharacterEquipmentList|entry|item=[[Heavenly helm]]|statModifier=Defense +62}} | |||
{{CharacterEquipmentList|entry|item=[[Metal king helm]]|statModifier=Defense +63}} | |||
{{CharacterEquipmentList|entry|item=[[Erdwin's coronet]]|statModifier=Defense +75}} | |||
{{CharacterEquipmentList|note|text=}} | |||
{{CharacterEquipmentList|footer}}|Armor| | |||
{{CharacterEquipmentList|header|title=Dragon Quest XI|subtitle=S: Definitive Edition|equipmentType=Armor}} | |||
{{CharacterEquipmentList|entry|item=[[Cobblestone clobber]]|statModifier=Defense +2}} | |||
{{CharacterEquipmentList|entry|item=[[Plain clothes]]|statModifier=Defense +4}} | |||
{{CharacterEquipmentList|entry|item=[[Arriviste's vest]]|statModifier=Defense +5}} | |||
{{CharacterEquipmentList|entry|item=[[Elevating vest]]|statModifier=Defense +5}} | |||
{{CharacterEquipmentList|entry|item=[[Vest for success]]|statModifier=Defense +5}} | |||
{{CharacterEquipmentList|entry|item=[[Trodain togs]]|statModifier=Defense +6}} | |||
{{CharacterEquipmentList|entry|item=[[Wayfarer's clothes]]|statModifier=Defense +7}} | |||
{{CharacterEquipmentList|entry|item=[[Boxer shorts]]|statModifier=Defense +10}} | |||
{{CharacterEquipmentList|entry|item=[[Leather armour]]|statModifier=Defense +11}} | |||
{{CharacterEquipmentList|entry|item=[[Templar's uniform]]|statModifier=Defense +13}} | |||
{{CharacterEquipmentList|entry|item=[[Scale armour]]|statModifier=Defense +16}} | |||
{{CharacterEquipmentList|entry|item=[[Chain mail]]|statModifier=Defense +20}} | |||
{{CharacterEquipmentList|entry|item=[[Bronze armour]]|statModifier=Defense +24}} | |||
{{CharacterEquipmentList|entry|item=[[Iron cuirass]]|statModifier=Defense +25}} | |||
{{CharacterEquipmentList|entry|item=[[Fur poncho]]|statModifier=Defense +29}} | |||
{{CharacterEquipmentList|entry|item=[[Iron armour]]|statModifier=Defense +32}} | |||
{{CharacterEquipmentList|entry|item=[[Gallopitan garb]]|statModifier=Defense +35}} | |||
{{CharacterEquipmentList|entry|item=[[Tortoise shell]]|statModifier=Defense +37}} | |||
{{CharacterEquipmentList|entry|item=[[Hairy vest]]|statModifier=Defense +38}} | |||
{{CharacterEquipmentList|entry|item=[[Full plate armour]]|statModifier=Defense +39}} | |||
{{CharacterEquipmentList|entry|item=[[Glombolero]]|statModifier=Defense +40}} | |||
{{CharacterEquipmentList|entry|item=[[Smart suit]]|statModifier=Defense +40}} | |||
{{CharacterEquipmentList|entry|item=[[Silver cuirass]]|statModifier=Defense +42}} | |||
{{CharacterEquipmentList|entry|item=[[Zombie mail]]|statModifier=Defense +42}} | |||
{{CharacterEquipmentList|entry|item=[[Prince's pea coat]]|statModifier=Defense +44}} | |||
{{CharacterEquipmentList|entry|item=[[Drasilian armour]]|statModifier=Defense +48}} | |||
{{CharacterEquipmentList|entry|item=[[Posh waistcoat]]|statModifier=Defense +48}} | |||
{{CharacterEquipmentList|entry|item=[[Silver mail]]|statModifier=Defense +48}} | |||
{{CharacterEquipmentList|entry|item=[[Heavy armour]]|statModifier=Defense +52}} | |||
{{CharacterEquipmentList|entry|item=[[King's coat]]|statModifier=Defense +53}} | |||
{{CharacterEquipmentList|entry|item=[[Mardi garb]]|statModifier=Defense +53}} | |||
{{CharacterEquipmentList|entry|item=[[Magic armour]]|statModifier=Defense +55}} | |||
{{CharacterEquipmentList|entry|item=[[Dragon mail]]|statModifier=Defense +60}} | |||
{{CharacterEquipmentList|entry|item=[[Emperor's attire]]|statModifier=Defense +61}} | |||
{{CharacterEquipmentList|entry|item=[[Platinum mail]]|statModifier=Defense +63}} | |||
{{CharacterEquipmentList|entry|item=[[Brigandine]]|statModifier=Defense +66}} | |||
{{CharacterEquipmentList|entry|item=[[Twinkling tuxedo]]|statModifier=Defense +67}} | |||
{{CharacterEquipmentList|entry|item=[[Spiked armour]]|statModifier=Defense +68}} | |||
{{CharacterEquipmentList|entry|item=[[Liquid metal jacket]]|statModifier=Defense +70}} | |||
{{CharacterEquipmentList|entry|item=[[Dancer's mail]]|statModifier=Defense +72}} | |||
{{CharacterEquipmentList|entry|item=[[Metal slime armour]]|statModifier=Defense +79}} | |||
{{CharacterEquipmentList|entry|item=[[Bandit mail]]|statModifier=Defense +80}} | |||
{{CharacterEquipmentList|entry|item=[[Gigant armour]]|statModifier=Defense +90}} | |||
{{CharacterEquipmentList|entry|item=[[Liquid metal armour]]|statModifier=Defense +97}} | |||
{{CharacterEquipmentList|entry|item=[[Mirror armour]]|statModifier=Defense +98}} | |||
{{CharacterEquipmentList|entry|item=[[Sacred armour]]|statModifier=Defense +100}} | |||
{{CharacterEquipmentList|entry|item=[[Metal king jacket]]|statModifier=Defense +101}} | |||
{{CharacterEquipmentList|entry|item=[[Irwin's armour]]|statModifier=Defense +104}} | |||
{{CharacterEquipmentList|entry|item=[[Erdwin's tunic]]|statModifier=Defense +120}} | |||
{{CharacterEquipmentList|entry|item=[[Legendary armour]]|statModifier=Defense +120}} | |||
{{CharacterEquipmentList|entry|item=[[Metal king armour]]|statModifier=Defense +126}} | |||
{{CharacterEquipmentList|footer}}|Shields| | |||
{{CharacterEquipmentList|header|title=Dragon Quest XI|subtitle=S: Definitive Edition|equipmentType=Shields}} | |||
{{CharacterEquipmentList|entry|item=[[Pot lid]]|statModifier=Defense +2}} | |||
{{CharacterEquipmentList|entry|item=[[Leather shield]]|statModifier=Defense +4}} | |||
{{CharacterEquipmentList|entry|item=[[Scale shield]]|statModifier=Defense +7}} | |||
{{CharacterEquipmentList|entry|item=[[Silver platter]]|statModifier=Defense +8}} | |||
{{CharacterEquipmentList|entry|item=[[Bronze shield]]|statModifier=Defense +10}} | |||
{{CharacterEquipmentList|entry|item=[[Gold platter]]|statModifier=Defense +12}} | |||
{{CharacterEquipmentList|entry|item=[[Iron shield]]|statModifier=Defense +15}} | |||
{{CharacterEquipmentList|entry|item=[[Light shield]]|statModifier=Defense +17}} | |||
{{CharacterEquipmentList|entry|item=[[Platinum platter]]|statModifier=Defense +20}} | |||
{{CharacterEquipmentList|entry|item=[[Steel shield]]|statModifier=Defense +22}} | |||
{{CharacterEquipmentList|entry|item=[[White shield]]|statModifier=Defense +24}} | |||
{{CharacterEquipmentList|entry|item=[[Platinum shield]]|statModifier=Defense +25}} | |||
{{CharacterEquipmentList|entry|item=[[Magic shield]]|statModifier=Defense +27}} | |||
{{CharacterEquipmentList|entry|item=[[Dragon shield]]|statModifier=Defense +30}} | |||
{{CharacterEquipmentList|entry|item=[[Shield of heliodor]]|statModifier=Defense +32}} | |||
{{CharacterEquipmentList|entry|item=[[Enchanted shield]]|statModifier=Defense +33}} | |||
{{CharacterEquipmentList|entry|item=[[Ice shield]]|statModifier=Defense +33}} | |||
{{CharacterEquipmentList|entry|item=[[Ethereal shield]]|statModifier=Defense +36}} | |||
{{CharacterEquipmentList|entry|item=[[Warrior's shield]]|statModifier=Defense +37}} | |||
{{CharacterEquipmentList|entry|item=[[Dark shield]]|statModifier=Defense +38}} | |||
{{CharacterEquipmentList|entry|item=[[Metal slime shield]]|statModifier=Defense +39}} | |||
{{CharacterEquipmentList|entry|item=[[Flame shield ]]|statModifier=Defense +40}} | |||
{{CharacterEquipmentList|entry|item=[[Liquid metal shield]]|statModifier=Defense +44}} | |||
{{CharacterEquipmentList|entry|item=[[Brain drainer]]|statModifier=Defense +45}} | |||
{{CharacterEquipmentList|entry|item=[[Ogre shield]]|statModifier=Defense +45}} | |||
{{CharacterEquipmentList|entry|item=[[Saintess shield]]|statModifier=Defense +46}} | |||
{{CharacterEquipmentList|entry|item=[[Silver shield]]|statModifier=Defense +51}} | |||
{{CharacterEquipmentList|entry|item=[[Psyche swiper]]|statModifier=Defense +52}} | |||
{{CharacterEquipmentList|entry|item=[[Ruinous shield]]|statModifier=Defense +52}} | |||
{{CharacterEquipmentList|entry|item=[[Devilry drinker]]|statModifier=Defense +63}} | |||
{{CharacterEquipmentList|entry|item=[[Goddess shield]]|statModifier=Defense +64}} | |||
{{CharacterEquipmentList|entry|item=[[Soul sucker]]|statModifier=Defense +73}} | |||
{{CharacterEquipmentList|entry|item=[[Erdwin's shield]]|statModifier=Defense +74}} | |||
{{CharacterEquipmentList|entry|item=[[Metal king shield]]|statModifier=Defense +75}} | |||
{{CharacterEquipmentList|note|text=}} | |||
{{CharacterEquipmentList|footer}}|Accessories| | |||
{{CharacterEquipmentList|header|title=Dragon Quest XI|subtitle=S: Definitive Edition|equipmentType=Accessories}} | |||
{{CharacterEquipmentList|entry|item=[[Aerofoil earrings]]|statModifier=Defense +5<br>Charm +10}} | |||
{{CharacterEquipmentList|entry|item=[[Agility ring]]|statModifier=Defense +5<br>Agility +17}} | |||
{{CharacterEquipmentList|entry|item=[[All-weather earrings]]|statModifier=Defense +5<br>Charm +16}} | |||
{{CharacterEquipmentList|entry|item=[[Angel's sandals]]|statModifier=Agility +25}} | |||
{{CharacterEquipmentList|entry|item=[[Anti-freeze earrings]]|statModifier=Defense +5<br>Charm +10}} | |||
{{CharacterEquipmentList|entry|item=[[Archangel's boots]]|statModifier=Defense +25}} | |||
{{CharacterEquipmentList|entry|item=[[Asbestos earrings]]|statModifier=Defense +5<br>Charm +10}} | |||
{{CharacterEquipmentList|entry|item=[[Assasin]]|statModifier=Critical +1%<br>Defense +2<br>Charm +5}} | |||
{{CharacterEquipmentList|entry|item=[[Blackout earrings]]|statModifier=Defense +5<br>Charm +16}} | |||
{{CharacterEquipmentList|entry|item=[[Bling-bling belt]]|statModifier=Defense +2<br>Charm +11}} | |||
{{CharacterEquipmentList|entry|item=[[Bow tie]]|statModifier=Defense +2<br>Charm +10}} | |||
{{CharacterEquipmentList|entry|item=[[Brainy bracer]]|statModifier=M. Might +20<br>M. Mend +20}} | |||
{{CharacterEquipmentList|entry|item=[[Brigand's mitts]]|statModifier=Defense +6<br>Deftness +32}} | |||
{{CharacterEquipmentList|entry|item=[[Bunny tail]]|statModifier=Defense +7}} | |||
{{CharacterEquipmentList|entry|item=[[Caligae of clarity]]|statModifier=M. Mend +20}} | |||
{{CharacterEquipmentList|entry|item=[[Care ring]]|statModifier=Defense +5}} | |||
{{CharacterEquipmentList|entry|item=[[Carer rivière]]|statModifier=Defense +3}} | |||
{{CharacterEquipmentList|entry|item=[[Catholicon ring]]|statModifier=Defense +5}} | |||
{{CharacterEquipmentList|entry|item=[[Choker of riddance]]|statModifier=Defense +3}} | |||
{{CharacterEquipmentList|entry|item=[[Cinderblock earrings]]|statModifier=Defense +5<br>Charm +16}} | |||
{{CharacterEquipmentList|entry|item=[[Circle of Serendipity]]|statModifier=Defense +5<br>Charm +10}} | |||
{{CharacterEquipmentList|entry|item=[[Concrete earrings]]|statModifier=Defense +5<br>Charm +10}} | |||
{{CharacterEquipmentList|entry|item=[[Devil's tail]]|statModifier=Defense +2<br>Agility +10}} | |||
{{CharacterEquipmentList|entry|item=[[Dogged collar]]|statModifier=Defense +4<br>Attack +8}} | |||
{{CharacterEquipmentList|entry|item=[[Dragon scale]]|statModifier=Defense +8<br>Attack +9}} | |||
{{CharacterEquipmentList|entry|item=[[Earthwyrm's eye]]|statModifier=Defense +7<br>HP +16<br> Charm +35}} | |||
{{CharacterEquipmentList|entry|item=[[Elfin charm]]|statModifier=Defense +10}} | |||
{{CharacterEquipmentList|entry|item=[[Freebooter's gloves]]|statModifier=Defense +48}} | |||
{{CharacterEquipmentList|entry|item=[[Full moon collar]]|statModifier=Defense +3}} | |||
{{CharacterEquipmentList|entry|item=[[Full moon ring]]|statModifier=Defense +5}} | |||
{{CharacterEquipmentList|entry|item=[[Gemma's charm]]|statModifier=Defense +1}} | |||
{{CharacterEquipmentList|entry|item=[[Gemma's eternal charm]]|statModifier=Defense +15}} | |||
{{CharacterEquipmentList|entry|item=[[Gloomy gloves]]|statModifier=Deftness +22}} | |||
{{CharacterEquipmentList|entry|item=[[Gold bracer]]|statModifier=Defense +4<br>Charm +6}} | |||
{{CharacterEquipmentList|entry|item=[[Gold chain]]|statModifier=Defense +1<br>HP +5<br>Charm +5}} | |||
{{CharacterEquipmentList|entry|item=[[Gold ring]]|statModifier=Defense +5<br>Charm +8}} | |||
{{CharacterEquipmentList|entry|item=[[Gold rosary]]|statModifier=M. Might +5<br>M. Mend +5}} | |||
{{CharacterEquipmentList|entry|item=[[Guru's gloves]]|statModifier=M. Might +17<br>M. Mend +17<br>Deftness +40}} | |||
{{CharacterEquipmentList|entry|item=[[Healer]]|statModifier=Defense +2<br>Charm +5}} | |||
{{CharacterEquipmentList|entry|item=[[Holy talisman]]|statModifier=Defense +5}} | |||
{{CharacterEquipmentList|entry|item=[[Life bracer]]|statModifier=Defense +3<br>HP +30}} | |||
{{CharacterEquipmentList|entry|item=[[Life ring]]|statModifier=Defense +5<br> HP +5}} | |||
{{CharacterEquipmentList|entry|item=[[Lucky dragon's wing]]|statModifier=Defense +7}} | |||
{{CharacterEquipmentList|entry|item=[[Meteorite bracer]]|statModifier=Defense +100}} | |||
{{CharacterEquipmentList|entry|item=[[Mighty armlet]]|statModifier=Attack +15}} | |||
{{CharacterEquipmentList|entry|item=[[Minister's mitts]]|statModifier=M. Mend +20<br>Deftness +48}} | |||
{{CharacterEquipmentList|entry|item=[[Mirror earrings]]|statModifier=Defense +5<br>Charm +10}} | |||
{{CharacterEquipmentList|entry|item=[[Monarch mark]]|statModifier=Defense +10<br>M. Might +30<br>M. Mend +30}} | |||
{{CharacterEquipmentList|entry|item=[[Murky mittens]]|statModifier=Deftness +32}} | |||
{{CharacterEquipmentList|entry|item=[[Mystic]]|statModifier=Defense +2<br>Charm +5}} | |||
{{CharacterEquipmentList|entry|item=[[Necklace of immunity]]|statModifier=Defense +3}} | |||
{{CharacterEquipmentList|entry|item=[[Ogler's digest]]|statModifier=Defense +1}} | |||
{{CharacterEquipmentList|entry|item=[[Papillon pendant]]|statModifier=Defense +3<br>HP +10<br>MP +10}} | |||
{{CharacterEquipmentList|entry|item=[[Pink pearl ring]]|statModifier=Defense +5<br>MP +10<br>Charm +10}} | |||
{{CharacterEquipmentList|entry|item=[[Prayer ring]]|statModifier=Defense +5<br>Charm +10}} | |||
{{CharacterEquipmentList|entry|item=[[Protective pendant]]|statModifier=Defense +3}} | |||
{{CharacterEquipmentList|entry|item=[[Ring of clarity]]|statModifier=Defense +5}} | |||
{{CharacterEquipmentList|entry|item=[[Ring of immunity]]|statModifier=Defense +5}} | |||
{{CharacterEquipmentList|entry|item=[[Ring of riddance]]|statModifier=Defense +5}} | |||
{{CharacterEquipmentList|entry|item=[[Ring of truth]]|statModifier=Defense +5}} | |||
{{CharacterEquipmentList|entry|item=[[Rosary]]|statModifier=M. Mend +6<br>MP +8}} | |||
{{CharacterEquipmentList|entry|item=[[Rousing ring]]|statModifier=Defense +5}} | |||
{{CharacterEquipmentList|entry|item=[[Rousing rose collar]]|statModifier=Defense +3}} | |||
{{CharacterEquipmentList|entry|item=[[Rubber earrings]]|statModifier=Defense +5<br>Charm +10}} | |||
{{CharacterEquipmentList|entry|item=[[Rubber gloves]]|statModifier=Defense +3<br>Deftness +12}} | |||
{{CharacterEquipmentList|entry|item=[[Ruby of protection]]|statModifier=Defense +16}} | |||
{{CharacterEquipmentList|entry|item=[[Safety goggles]]|statModifier=Defense +3}} | |||
{{CharacterEquipmentList|entry|item=[[Scholar's specs]]|statModifier=M. Might +15<br>M. Mend +15<br>Charm +15}} | |||
{{CharacterEquipmentList|entry|item=[[Shield-bearer]]|statModifier=Block +1%<br>Parry +1%<br>Charm +5<br>Defense +10}} | |||
{{CharacterEquipmentList|entry|item=[[Skull ring]]|statModifier=Defense +5}} | |||
{{CharacterEquipmentList|entry|item=[[Slime earrings]]|statModifier=Defense +2<br>Charm +6}} | |||
{{CharacterEquipmentList|entry|item=[[Sorcerer's ring]]|statModifier=Defense +5<br>MP +10}} | |||
{{CharacterEquipmentList|entry|item=[[Sorcerer's stone]]|statModifier=M. Mend +13<br>M. Might +14}} | |||
{{CharacterEquipmentList|entry|item=[[Sovereign seal]]|statModifier=Defense +7<br>Charm +35}} | |||
{{CharacterEquipmentList|entry|item=[[Springheel boots]]|statModifier=Defense +25}} | |||
{{CharacterEquipmentList|entry|item=[[Spirit bracer]]|statModifier=Defense +7<br>MP +30}} | |||
{{CharacterEquipmentList|entry|item=[[Star of clarity]]|statModifier=Defense +3}} | |||
{{CharacterEquipmentList|entry|item=[[Strength ring]]|statModifier=Attack +5}} | |||
{{CharacterEquipmentList|entry|item=[[Supplicant]]|statModifier=Defense +2<br>Charm +5}} | |||
{{CharacterEquipmentList|entry|item=[[Titan belt]]|statModifier=Defense +5<br>Attack +12}} | |||
{{CharacterEquipmentList|entry|item=[[Tough guy tattoo]]|statModifier=Attack +8}} | |||
{{CharacterEquipmentList|entry|item=[[Torc of truth]]|statModifier=Defense +3}} | |||
{{CharacterEquipmentList|entry|item=[[Traveller's hood]]|statModifier=Defense +4}} | |||
{{CharacterEquipmentList|entry|item=[[Trickster]]|statModifier=Evasion+1%<br>Defense +2<br>Charm +5}} | |||
{{CharacterEquipmentList|entry|item=[[Utility belt]]|statModifier=Defense +2<br>Deftness +15}} | |||
{{CharacterEquipmentList|entry|item=[[Vanguard]]|statModifier=Defense +2<br>Charm +5<br>Agility +10}} | |||
{{CharacterEquipmentList|entry|item=[[Venus' tear]]|statModifier=Defense +7<br>Charm +35}} | |||
{{CharacterEquipmentList|entry|item=[[Warlock]]|statModifier=Defense +2<br>M. Might +3<br>M. Mend +3<br>Charm +5}} | |||
{{CharacterEquipmentList|entry|item=[[Wings of serendipity]]|statModifier=Defense +5<br>Charm +20}} | |||
{{CharacterEquipmentList|entry|item=[[Wristorative]]|statModifier=Defense +7}} | |||
{{CharacterEquipmentList|footer}}}} | |||
====[[Shypox]] dialogue==== | |||
In Battle: | |||
{{spoiler|start}} | |||
*[Player name] remembers the time he tried to cast a love spell on Sandy… | |||
*[Player name] takes another look at the outfit he’s wearing… | |||
*[Player name] suddenly recalls a rude joke Mayor Dunstan once told him… | |||
*Out of nowhere, [Player name]’s face suddenly turns bright red! | |||
*[Player name] remembers the time he slicked back his hair to try and impress Gemma… | |||
*[Player name] thinks over some of the ‘cool’ spell names he came up with as a kid… | |||
*[Player name] feels the enemy staring into his very soul… | |||
*[Player name] realises that his flies are undone! | |||
*[Player name] notices that he’s got some food stuck in his teeth! | |||
*[Player name] remembers the time he called a stranger ‘Mum’… | |||
*[Player name] remembers the time his mum got mad when he wet the bed… | |||
*[Player name] remembers when he gave Gemma some advice that was completely wrong… | |||
*[Player name] suddenly remembers the time when he slipped up on some horse poo… | |||
*[Player name] suddenly remembers the time when he cried watching the sunset… | |||
*[Player name] comes over all ticklish and starts giggling… | |||
*[Player name] remembers the time Amber burped loudly in front of guests… | |||
*A gust of wind suddenly ruins [Player name]’s perfect hair day! | |||
*Out of nowhere, [Player name] lets out an enormous burp! | |||
*[Player name] is reminded of the time he was struck dumb when talking to a beautiful lady… | |||
*[Player name] suddenly becomes convinced he might have wet himself… | |||
*[Player name] notices that his hair is looking a bit rubbish today… | |||
*[Player name] starts thinking about how much of a burden he’s been to everyone… {{tt|*|Note: Only appears after Veronica and Serena join the party in Act 1.}} | |||
*[Player name] notices that his socks are on inside out… | |||
*[Player name] recalls the time he showed Gemma a dance he’d made up… | |||
*[Player name] thinks about a soppy poem he wrote when he was younger… | |||
*Suddenly, all [Player name] can think of is puff-puffs! | |||
*[Player name] suddenly begins crying for no reason… | |||
*[Player name] is suddenly reminded of the time he told a joke that completely bombed… | |||
*[Player name]’s eyes meet the enemy’s, and he’s suddenly strangely flustered… | |||
*[Player name] starts to think the enemy looks kind of cute… | |||
*[Player name] catches himself thinking he might be kind of handsome… | |||
*The elastic in [Player name]'s pants suddenly snaps with a twang! | |||
He’s overcome with crippling embarrassment, and can’t talk! | |||
{{spoiler|end}} | |||
When speaking to townsfolk: | |||
{{spoiler|start}} | |||
[Player name] opens his mouth to try and speak to the person in front of him… | |||
*But his whole body is shaking! He’s so nervous he could wet himself! | |||
*But he can’t even think of what to say! He’s overcome with crippling embarrassment, and can’t talk! | |||
*But wouldn’t they be annoyed at some stranger just walking up and saying hello? They might think he’s some kind of weirdo! | |||
*But they might be really busy right now… Yes. He’s sure they’d hate to be interrupted. What was he even thinking!? | |||
*But he just can’t bring himself to look them in the eye! …But then where should he look!? | |||
*But in his enthusiasm, he accidentally breaks wind! | |||
*But his voice cracks, and nothing but an awkward squeak comes out! | |||
*But he’s suddenly struck by how attractive they are, and his heart starts pounding fit to burst! | |||
*But their eyes meet, and suddenly they’re staring straight at each other! This is just too awkward! | |||
*But what should he talk about? If he can’t think of anything interesting, he’ll come across as a dreadful bore! No, it’s no good! | |||
*But he just can’t muster the courage! | |||
*But…did they just look at him and smirk? There must be something stuck to his face! | |||
*But his throat’s so dry he can’t say a word! | |||
*But what if he stutters or stammers!? He can’t risk it! | |||
*But his mind goes completely blank! What was he about to say again…? He can’t remember! | |||
*But then he remembers how red and puffy his eyes have been lately. He must look absolutely ghastly! | |||
*But he suddenly realises that the smell of horse has soaked into his clothes! He smells like a poorly kept stable! | |||
*But his mind is abruptly filled with memories of when he wet the bed as a child! | |||
*But for some reason, he can’t stop thinking about the time he made a complete fool of himself and fell off his horse in front of Gemma! | |||
*But he suddenly remembers all the hours he spent as a boy pretending to sign his autograph for imaginary fans! | |||
*But wait— Does his breath smell? Could he even tell if it did? Now he can’t stop worrying about it! | |||
*But he can’t shake the feeling that they’re laughing at his haircut! Is it really that bad? …Maybe it is! | |||
*But then he remembers an awful joke, and starts guffawing uncontrollably! | |||
*But he’s already been staring at them for a while… They probably think he’s some kind of creep! | |||
*But what if they think he’s trying to chat them up? That would be mortifying! | |||
*But he doesn’t really have anything that important to say, and is worried they’ll think he’s a nuisance. | |||
*But he suddenly notices there’s food all around his mouth! | |||
*But he’s struck by a sudden wave of shyness. | |||
*But he suddenly realises he’s trodden in horse manure! | |||
*But the shame-inducing power of Shypox stops his tongue! | |||
*But he suddenly pictures how he must look, and the smile freezes on his face! | |||
*But he almost calls them ‘Mum’! He stops himself before it’s too late, but he was a hair’s breadth from disaster there! | |||
*But they look just like his favourite character from a book he read as a child, and he’s suddenly star-struck! | |||
*But can he really just do that? Walk up to a complete stranger and talk to them? …Nope, not any more, he can’t! | |||
*But can he really just do that? Walk up to a complete stranger and say hello to them? …Nope, not any more, he can’t! | |||
*But he just can’t do it! He can’t bring himself to strike up a conversation with a stranger out of the blue! | |||
*But his stomach suddenly starts rumbling like crazy! | |||
*But he suddenly remembers the time he lost an argument with Sandy and cried! | |||
*But they look just like someone he had a huge crush on when he was younger, and he starts to feel his face turning red! | |||
*But he can suddenly feel everybody looking at him, and he can’t think about anything else! | |||
*But he just can’t do it! He can’t bring himself to start a conversation! | |||
{{spoiler|end}} | |||
==={{DQR}}=== | ==={{DQR}}=== | ||
| Line 708: | Line 1,187: | ||
===''[[Final Fantasy]] Brave Exvius''=== | ===''[[Final Fantasy]] Brave Exvius''=== | ||
As part of a collaborative series of events to commemorate | As part of a collaborative series of events to commemorate {{Main Series}} titles, the Luminary appeared as a summonable vision shortly after the international release of the game. | ||
==Etymology== | ==Etymology== | ||
A ''luminary'' is a person of prominence or great achievement, and the word can also be used to refer to one of the celestial bodies that gives off visible light. Specifically, this latter definition is used for the moon and sun in most astronomical discourse. | A ''luminary'' is a person of prominence or great achievement, and the word can also be used to refer to one of the celestial bodies that gives off visible light. Specifically, this latter definition is used for the moon and sun in most astronomical discourse and in the context of {{XI}}'s story it refers to the populations' reverence of [[Erdwin's Lantern]]. | ||
==Trivia== | ==Trivia== | ||
* The Luminary is the first protagonist to not be referred to as Yuusha (勇者) in promotional material nor the game itself. Instead, the title of Shujinkō (主人公) is used, which means protagonist in Japanese. | *The Luminary is the first protagonist to not be referred to as Yuusha (勇者) in promotional material nor the game itself. Instead, the title of Shujinkō (主人公) is used, which means protagonist in Japanese. | ||
* The Luminary has some similarities with some of the heroes from previous | *The Luminary has some similarities with some of the heroes from previous installments: | ||
** He comes from a lineage of previous heroes, much like the original | **He comes from a lineage of previous heroes, much like the original {{Hero 1}} and the {{Prince of Midenhall}}. | ||
** He sets out on his journey on his 16th birthday, similar to [[Erdrick]]. As the story advances, he is able to wield the [[Erdrick's sword|Sword of Light]], also known as Erdrick's sword in other games. | ** He sets out on his journey on his 16th birthday, similar to [[Erdrick]]. As the story advances, he is able to wield the [[Erdrick's sword|Sword of Light]], also known as Erdrick's sword in other games. | ||
** He was born with a | **He was born with the Mark of Light, a mark on his left hand with mysterious powers which glows in times of danger, much like [[Dai]] of {{DQDai}} (initially appears on his forehead before moving to his hand) and the {{Hero 7}} of {{Dragon Quest VII}}. | ||
** His inability to advance past the second tier of explosive spells is | ** His inability to advance past the second tier of explosive spells is shared by Erdrick, [[Hero (Dragon Quest IV)|Solo]] and [[Dai]], who are also only able to learn up to [[Boom]]. | ||
**His family connections make him similar to both Erdrick and [[Eight]], as well. The Luminary finds out that his father, Irwin, was a great warrior himself much like [[Ortega]]. He is also secretly a prince from the kingdom of [[Dundrasil]] as revealed by [[Rab]], his maternal grandfather, much like Eight finding out about his royal lineage from his grandfather, [[Chen Mui]]. | **His family connections make him similar to both Erdrick and [[Hero (Dragon Quest VIII)|Eight]], as well. The Luminary finds out that his father, Irwin, was a great warrior himself much like [[Ortega]]. He is also secretly a prince from the kingdom of [[Dundrasil]] as revealed by [[Rab]], his maternal grandfather, much like Eight finding out about his royal lineage from his grandfather, [[Chen Mui]]. | ||
* In the international version of the game, there is a special costume that allows him to dress up like the | **His "-splitter" series of moves are animated with the signature motion of [[Dai]]'s [[Avan Strash]], and include three techniques ([[Earthsplitter]], [[Seasplitter]] and [[Skysplitter]]) whose Japanese names are drawn from the basic moves of the [[Avan]] school. He and his party mage [[Veronica]] can also combine their powers to cast [[Frizz Cracker]], a spell which originated as the signature move of Dai's party mage [[Popp]]. | ||
* He is the first | *In the international version of the game, there is a special costume that allows him to dress up like the {{Hero 8}} from {{VIII}}. The outfit was added for the ''S'': {{Definitive Edition}} version of the game in all regions. | ||
* In the international [https://www.famitsu.com/news/202001/11190471.html fan poll] for | *He is the first Hero in the main series to have a voice actor in the English version of the games. English actor Rasmus Hardiker provides his vocal grunts in various scenes and in battle. | ||
* The Luminary has the same hairstyle as Android 17 of [[Akira Toriyama]]'s Dragon Ball series, as well as a similar physique. | *In the international [https://www.famitsu.com/news/202001/11190471.html fan poll] for {{Dragon Quest XI}} released by Japanese gaming magazine Famitsu, the Luminary was voted the third most popular male character in the game and the fifth most popular character overall, with a total of 289 votes. | ||
*The Luminary has the same hairstyle as Android 17 of [[Akira Toriyama]]'s ''[[Dragon Ball]]'' series, as well as a similar physique. | |||
*The Luminary and his companions each represent one of the classes in {{Dragon Quest III}}. The Luminary represents the {{Hero 3}}. | |||
==Gallery== | ==Gallery== | ||
<center><gallery> | <center><gallery> | ||
File:XI Hero battle pose art.png|Battle pose. | |||
File:DQXI Hero.png|Concept art. | |||
File:DQXI Hero Render.png|3D render. | |||
File:DQXI Hero Combat.png|Combat pose | |||
File:DQXI babyhero.jpg|The Hero as an infant, being held by Chalky. | |||
File:XI Hero infancy concept art.png|Infant Hero concept art. | |||
File: | File:XI Hero youth concept art.png|The Hero's height as a child. | ||
File:Luminary daddy's boy costume.png|"Daddy's boy" | File:XI Hero youth Rab's vision.png|The Hero seen in Rab's vision in the ''S: definitive edition'' version. | ||
File:Luminary hotto stuff costume.png|" | File:DQXI Hero mark.jpg|The glowing mark on the Hero's left hand. | ||
File: | File:DQXI ElevenPep.jpg|The Hero becoming pepped up in battle. | ||
File:Luminary the fugitive | File:DQXI Hero Erdricks sword.png|The Hero carrying the Sword of Light on his back. | ||
File:Luminary the luminary of legend | File:XI Hero Coblestone's finest cgi.png|"Cobblestone's finest". | ||
File:Luminary the parade participant | File:Luminary Cobblestone's finest costume.png | ||
File:Luminary the | File:Luminary daddy's boy costume.png|"Daddy's boy". | ||
File:Luminary the | File:XI Hero Hotto stuff cgi.png|"Hotto stuff". | ||
File:XI Hero Hotto stuff concept art.png|Hotto stuff concept art. | |||
File:Luminary hotto stuff costume.png | |||
File:XI Hero Drasillian armor cgi.png|"The Drasilian". | |||
File:XI Hero Drasillian armor concept art.png|The Drasilian concept art. | |||
File:XI Hero Drasilian S edition cgi.png|"The Drasilian" ''S: definitive edition''. | |||
File:XI Hero Drasilian S edition concept art.png|The Drasilian S concept art. | |||
File:Luminary the Drasilian costume.png | |||
File:XI Hero fugitive cgi.png|"The fugitive". | |||
File:Luminary the fugitive costume.png | |||
File:XI Hero luminary of legend cgi.png|"Luminary of Legend". | |||
File:XI Hero luminary of legend concept art.png|Luminary of legend concept art. | |||
File:Luminary the luminary of legend costume.png | |||
File:XI Hero parade participant cgi.png|"The parade participant". | |||
File:XI Hero parade participant detailing.png|Parade participant details. | |||
File:Luminary the parade participant costume.png | |||
File:XI Hero galloptian garb cgi.png|"Saviour of the sands". | |||
File:XI Hero galloptian garb concept art.png|Saviour of the sands concept art. | |||
File:Luminary the savior of the sands costume.png | |||
File:XI Hero Trodain cgi.png|"The Trodain". | |||
File:Luminary the trodain costume.png | |||
File:XI Hero mask artwork.png|The Hero's mask worn in the Octagonia tournament. | |||
File:XI Hero expression chart.png|Hero's expression chart. | |||
File:XI Hero fish expression chart.png|Fish expression chart. | |||
File:XI Hero fish concept art.png|Fish concept art. | |||
File:DQR Luminary.png|{{Rivals}} artwork. | |||
File:DQR Luminary (2).png | |||
File:DQR Luminary (3).png | |||
File:DQT Luminary.png|''[[Dragon Quest Tact|Tact]]'' artwork. | |||
File:DQ40th Dragon rider.png|40th anniversary artwork. | |||
File:DQXIHeroSSBU.png|Super Smash Bros. Ultimate | |||
File:HeroIntro.png|XI's Hero, as seen in the splash art of "Heroic Encounters", the character trailer for the Hero in Super Smash Bros. Ultimate. | |||
</gallery></center> | </gallery></center> | ||
{{ | {{HeroesNav}} | ||
{{ | {{DQXINav}} | ||
{{ | {{SSBUNav}} | ||
[[Category: Royalty]] | [[Category:Royalty]] | ||
[[Category:Party members]] | [[Category:Party members]] | ||
[[Category:Dragon Quest XI characters]] | [[Category:Dragon Quest XI characters]] | ||
| Line 757: | Line 1,267: | ||
[[fr:Héros (Dragon Quest XI)]] | [[fr:Héros (Dragon Quest XI)]] | ||
[[es:Héroe (Dragon Quest XI)]] | |||
Latest revision as of 14:34, 7 May 2026
| Hero | |
| Dragon Quest XI | |

| |
| Sprite(s) | |
| Japanese name | 勇者 |
| Romaji | Yuusha |
| Title | Luminary |
| Vocation | Hero |
| Race | Human |
| Age | 16 |
| Family | King Irwin† (father) Queen Eleanor† (biological mother) Amber (adoptive mother) Chalky† (adoptive grandfather) Rab (biological grandfather) Erdwin† (ancestor) Gemma (potential wife) |
| Voice actor | Rasmus Hardiker (English) Mitsuki Saiga (Japanese, XI S, Super Smash Bros.) |
The Hero of Dragon Quest XI, known as the Luminary within his story, is a young man from the sleepy village of Cobblestone. After participating in a coming-of-age ceremony, he finds out he is the reincarnation of an ancient Hero who once saved the world. On his 16th birthday, he sets out on his journey in order to fulfill his destiny.
In Super Smash Bros. Ultimate, the Luminary has been given the default name Eleven (イレブン) in order to differentiate him from the other three Heroes appearing in the game, following the naming convention seen in the promotional material of other games.
Appearance and Personality[edit | edit source]
He is a young man with round blue eyes and dirty blond chin-length hair in a bob cut. On his left hand, he bears a mysterious mark that has appeared since the day he was born. The mark glows when the Luminary is in danger. He wears a long, sleeveless brown and purple leather tunic over a black long-sleeved shirt, brown trousers, and tan geen leather boots. Around his waist, he wears a small bag the same colour, attached to a leather belt, that holds all his items. He carries a scabbard across his back; the one depicted in his character art is a Cobblestone sword. The Luminary's good looks and hair are commented on by various characters.
Like the heroes before him, the Luminary is a silent protagonist. However, several different characters say various things that seem to acknowledge or imply a few personality traits. Like a handful of other heroes in the series, he seems to have a tendency to sleep in, which various party members will comment on. A mischievous streak is also acknowledged, as two flashbacks mention pranks that he played during his childhood. He is also kind-hearted and worries a lot about others. During the events of the second act, he is implied to have a more serious and grown-up demeanor, which carries over into the beginning of act three. Some yes/no options that the player is given do imply some sort of cheeky personality; however, it is mostly the dramatic reaction of the other characters that fuels this.
In many lines of party talk dialogue and even one or two cutscenes, the party members (namely, Erik) make comments about the Hero that seem to imply quite a few different personality traits the latter may have. Below are a few examples.
Appearances[edit | edit source]
Dragon Quest XI: Echoes of an Elusive Age[edit | edit source]
Story[edit | edit source]
Act One[edit | edit source]
Chalky, after finding the baby Luminary at the bottom of the Cobblestone Falls, takes him in to raise him as his grandson. Chalky's daughter Amber assumes the role of his mother, and the Hero is raised as an ordinary boy in the village until his 16th birthday, where he undergoes the traditional coming-of-age rite of passage by climbing Cobblestone Tor, with his childhood friend Gemma who was born on the day he was found. When reaching the top of the mountain to complete the ceremony, Gemma is attacked by a Hades condor and the Hero's Luminary powers awaken in order to save her, casting an ambiguous spell of the zap line that strikes down the monster, and the entire village sees the lightning from the bottom of the Tor. When the duo make it home safely, the truth is revealed by Amber that he is the reincarnation of the Luminary and he is instructed to depart for Heliodor and search for an audience with the King to learn more of his destiny. She gives then gives him the precious pendant Important Item, which will apparently prove his status as the Luminary.
That night, the Hero can't sleep, and wakes up in the dead of night to go take a walk in the village. There, he sees Gemma underneath the tree they used to play under, and she reminisces on their past before saying a goodbye and running away crying. When he leaves for Heliodor the following morning, he is gifted Cobblestone's finest horse, and Gemma gives him a hand-made Gemma's charm gift accessory as good luck. She asks him to not forget any of them on his adventure, and with that he leaves.
Act Two[edit | edit source]
Postgame[edit | edit source]
Base stats & pep bonus[edit | edit source]
| Attribute | Starting Stats | Maximum Stats | Skills |
| Level | 1 | 99 | - |
| HP | 22 | 750 | +20 |
| MP | 0 | 460 | +20 |
| Strength | 8 | 380 | +75 |
| Agility | 6 | 350 | +10 |
| Resilience | 6 | 220 | +10 |
| Magical Might | 5 | 350 | +55 |
| Magical Mending | 3 | 330 | +50 |
| Deftness | 5 | 200 | +10 |
| Charm | 4 | 250 | +40 |
| Initial gear | Cobblestone sword, Plain clothes Cobblestone greatsword (in inventory) | ||
| Pep boost | Strength +20% (40%), resilience +20% (40%) Critical rate up (critical rate further increased) Parenthesis accounts for pep-up power-up bonuses. | ||
- The Luminary also possesses a minor resistance to being cursed.
Spells[edit | edit source]
| Name | Level | MP | Target | Description |
| Frizz | 2 | 2 | One enemy | Up to 34~38 fire damage at 150 magical might |
|---|---|---|---|---|
| Heal | 5 | 3 | One ally | Restores at least 25 HP to a single ally. |
| Sizz | 8 | 3 | Enemy group | Up to 28~36 fire damage at 132 magical might |
| Evac | 9 | 0 | All allies | Allows the caster to return instantly to the start of a dungeon, cave, or tower. |
| Bang | 15 | 6 | All enemies | Up to 44~52 light damage at 195 magical might |
| Snooze | 16 | 3 | One enemy | Puts a single enemy to sleep. |
| Midheal | 19 | 6 | One ally | Restores at least 65 HP to a single ally. |
| Sizzle | 23 | 7 | Enemy group | Up to 82~90 fire damage at 227 magical might |
| Frizzle | 25 | 8 | One enemy | Up to 106~122 fire damage at 287 magical might |
| Zing | 28 | 12 | One ally | Resurrects a fallen ally with a 50% success rate. |
| Moreheal | 30 | 12 | One ally | Restores at least 164 HP to a single ally. |
| Boom | 31 | 12 | All enemies | Up to 140~148 light damage at 304 magical might |
| Kasnooze | 35 | 8 | Enemy group | Puts all enemies to sleep. |
| Kasizz | 40 | 16 | Enemy group | Up to 216~232 fire damage at 362 magical might |
| Kafrizz | 56 | 21 | One enemy | Up to 307~331 fire damage at 344 magical might |
| Kazing | 62 | 24 | One ally | Resurrects a fallen ally with a 100% success rate. |
| Zoom | Event | 0 | All allies | Allows the caster to return instantly to certain places they have visited before. |
Event abilities[edit | edit source]
| Name | MP | Target | Description |
| Quadraslash | 24 | All Enemies | Up to 330~390 non-elemental damage |
|---|---|---|---|
| Blightsplitter | 16 | All enemies | Up to 210~250 darkness damage |
| Brightsplitter | 16 | All enemies | Up to 210~250 light damage |
| Earthsplitter | 16 | All enemies | Up to 210~250 earth damage |
| Flamesplitter | 16 | All enemies | Up to 210~250 fire damage |
| Seasplitter | 16 | All enemies | Up to 210~250 ice damage |
| Skysplitter | 16 | All enemies | Up to 210~250 wind damage |
- NOTE: the Luminary must be equipped with the Sword of Light or one of its reforged forms to use the -splitter skills. Completing quest #60 raises the base damage to 200~240 and the maximum to 400~440.
Character builder[edit | edit source]
Swords[edit | edit source]
| Name | Skill points | MP | Target | Pep | Oomph | Info |
| Flame Slash | 3 | 2 | One enemy | Yes | Yes | 120% (plus 5) fire damage |
|---|---|---|---|---|---|---|
| Attack Power When Wielding +3 | 4 | -- | -- | -- | -- | Increase attack +3 when equipped with a sword |
| Critical Hit Chance When Wielding +2% | 6 | -- | -- | -- | -- | Increases chance to land a Critical Hit +2% when equipped with a sword |
| Sword Stance | 7 | 2 | -- | -- | -- | Increases parrying chance by 33% for four turns |
| Attack Power When Wielding +6 | 10 | -- | -- | -- | -- | Increase attack +6 when equipped with a sword |
| Dragon Slash | 10 | 2 | One enemy | Yes | Yes | 200% (plus 10) damage to dragon-family monsters |
| Attack Power When Wielding +10 | 12 | -- | -- | -- | -- | Increase attack +10 when equipped with a sword |
| Dual-Wielding | 12 | -- | -- | -- | -- | Lets you dual wield a weapon on the left hand. Hits twice with sword abilities, but not animated. |
| Metal Slash | 12 | 2 | One enemy | Yes | Yes | 1~2 damage to metal slimes, cannot miss |
| Miracle Slash | 16 | 4 | One enemy | Yes | Yes | Restores at least 20 HP |
Greatswords[edit | edit source]
| Name | Skill points | MP | Target | Pep | Oomph | Info |
| Greatsword Guard | 3 | 2 | -- | -- | -- | Increases parrying chance by 33% for four turns |
|---|---|---|---|---|---|---|
| Attack Power When Wielding +5 | 4 | -- | -- | -- | -- | Increase attack +5 when equipped with a greatsword |
| Critical Hit Chance When Wielding +2% | 6 | -- | -- | -- | -- | Increases chance to land a Critical Hit +2% when equipped with a greatsword |
| Helichopter | 7 | 4 | One group | Yes | First hit | Full damage to a group of enemies |
| Attack Power When Wielding +15 | 12 | -- | -- | -- | -- | Increase attack +15 when equipped with a greatsword |
| Frost Fangs | 12 | 10 | One group | Yes | First hit | Up to 130~140 ice damage to a group of enemies, 25% chance to stun each, stun rate is dependent on enemy resistance |
| Cutting Edge | 10 | 8 | One | Yes | Yes | 157%~225% damage to a single enemy, cannot critical hit |
| Critical Hit Chance When Wielding +3% | 12 | -- | -- | -- | -- | Increases chance to land a Critical Hit +3% when equipped with a sword |
| Unbridled Blade | 16 | 16 | One enemy | Yes | Yes | 290%~310% damage to a single enemy, cannot critical hit |
| Attack Power When Wielding +10 | 10 | -- | -- | -- | -- | Increase attack +10 when equipped with a greatsword |
Swordmastery[edit | edit source]
| Name | Skill points | MP | Target | Pep | Oomph | Info |
| Counter When Blocking/Parrying | 12 | -- | -- | -- | -- | N/A |
|---|---|---|---|---|---|---|
| Strength +25 | 12 | -- | -- | -- | -- | N/A |
| Critical Hit Chance +3% | 16 | -- | -- | -- | -- | N/A |
| Falcon Slash | 16 | 4 | One enemy | Yes | All hits | Attacks one enemy twice, each hit does full damage. |
| Sword Dance | 16 | 8 | One group | Yes | All hits | Randomly slashes four enemies for 75% damage per hit |
| Gigaslash | 25 | 16 | All enemies | Yes | No | Up to 210~250 lightning damage. Must be equipped with a sword to use. |
| Gigasmash | 25 | 16 | One group | Yes | No | Up to 250~270 lightning damage. Must be equipped with a greatsword to use. |
| Blade of Ultimate Power | 36 | 48 | One enemy | Yes | No | Up to 680~720 non-elemental damage to one enemy |
| Gigacrash | 36 | 32 | One group | Yes | No | Up to 440~460 lightning damage. Must be equipped with a greatsword to use. |
| Gigagash | 36 | 32 | All enemies | Yes | No | Up to 390~430 lightning damage. Must be equipped with a sword to use. |
Luminary[edit | edit source]
| Name | Skill points | MP | Target | Pep | Oomph | Info |
| Agility +10 | 8 | -- | -- | -- | -- | N/A |
|---|---|---|---|---|---|---|
| Deftness +10 | 8 | -- | -- | -- | -- | N/A |
| Holy Protection | 8 | 2 | -- | -- | -- | Keeps monsters at bay for 30 seconds |
| Pep Chance +5% | 8 | -- | -- | -- | -- | N/A |
| Poof | 8 | 2 | All enemies | -- | -- | Attempts to expel enemies |
| Resilience +10 | 8 | -- | -- | -- | -- | N/A |
| Strength +10 | 8 | -- | -- | -- | -- | N/A |
| Zap | 8 | 8 | One group | No | -- | Up to 131~141 lightning damage at 161 magical might |
| Charm +40 | 12 | -- | -- | -- | -- | N/A |
| Fullheal | 12 | 24 | One ally | No | -- | Fully heal a single party member. |
| Kaclang | 12 | 8 | One ally | No | -- | Turns one party member to metal. They are immune to damage, but cannot act for 2-4 turns. |
| Magical Might +5 | 12 | -- | -- | -- | -- | N/A |
| Maximum MP +20 | 12 | -- | -- | -- | -- | N/A |
| Strength +15 | 12 | -- | -- | -- | -- | N/A |
| Zapple | 12 | 22 | One group | No | -- | Up to 314~344 lightning damage at 244 magical might |
| Magical Mending +50 | 14 | -- | -- | -- | -- | N/A |
| Magical Might +50 | 14 | -- | -- | -- | -- | N/A |
| Maximum HP +20 | 14 | -- | -- | -- | -- | N/A |
| Big Banga | 16 | 24 | One group | No | -- | Up to 330~385 fire damage to a group of enemies. |
| Kazap | 16 | 48 | One group | No | -- | Up to 695~745 lightning damage to a group of enemies at 350 magical might |
| Omniheal | 16 | 64 | All allies | No | -- | Fully restores all party members' HP. |
| Pep Chance +10% | 20 | -- | -- | -- | -- | N/A |
| Pep-Up Power-Up | 20 | -- | -- | -- | -- | Increases the boost given during Pep-Up |
| Pep Up | 25 | 25 | -- | -- | -- | Automatically enter a pepped up state that lasts only 4~6 turns instead of the standard 6~8 |
Equipment[edit | edit source]
| Dragon Quest XI (S: Definitive Edition) | |
|---|---|
| Helmet | Modifier(s) |
| Bandana | Defense +1 |
| Trodain bandana | Defense +1 |
| Leather hat | Defense +3 |
| Pointy hat | Defense +5 |
| Feathered cap | Defense +8 |
| Turban | Defense +12 |
| Stone hardhat | Defense +15 |
| Iron helmet | Defense +16 |
| Fur hood | Defense +18 |
| Bronze helmet | Defense +18 |
| Malleable mask | Defense +19 |
| Hermes' hat | Defense +20 |
| Mercury's bandana | Defense +23 |
| Iron mask | Defense +25 |
| Steel helmet | Defense +25 |
| Drasilian helm | Defense +28 |
| Happy hat | Defense +31 |
| Iron headgear | Defense +32 |
| Papillon mask | Defense +33 |
| Warrior's helm | Defense +35 |
| Platinum headgear | Defense +36 |
| Hades' helm | Defense +37 |
| Thinking cap | Defense +38 |
| Mythril helm | Defense +38 |
| Metal slime helm | Defense +39 |
| Dragon bandana | Defense +41 |
| Raging bull helm | Defense +42 |
| Great helm | Defense +46 |
| Liquid metal helm | Defense +49 |
| Autumn shower hat | Defense +51 |
| Spring breeze hat | Defense +51 |
| Summer cloud hat | Defense +51 |
| Phantom mask | Defense +51 |
| Winter sky hat | Defense +51 |
| Irwin's helm | Defense +52 |
| Heavenly helm | Defense +62 |
| Metal king helm | Defense +63 |
| Erdwin's coronet | Defense +75 |
| Dragon Quest XI (S: Definitive Edition) | |
|---|---|
| Armor | Modifier(s) |
| Cobblestone clobber | Defense +2 |
| Plain clothes | Defense +4 |
| Arriviste's vest | Defense +5 |
| Elevating vest | Defense +5 |
| Vest for success | Defense +5 |
| Trodain togs | Defense +6 |
| Wayfarer's clothes | Defense +7 |
| Boxer shorts | Defense +10 |
| Leather armour | Defense +11 |
| Templar's uniform | Defense +13 |
| Scale armour | Defense +16 |
| Chain mail | Defense +20 |
| Bronze armour | Defense +24 |
| Iron cuirass | Defense +25 |
| Fur poncho | Defense +29 |
| Iron armour | Defense +32 |
| Gallopitan garb | Defense +35 |
| Tortoise shell | Defense +37 |
| Hairy vest | Defense +38 |
| Full plate armour | Defense +39 |
| Glombolero | Defense +40 |
| Smart suit | Defense +40 |
| Silver cuirass | Defense +42 |
| Zombie mail | Defense +42 |
| Prince's pea coat | Defense +44 |
| Drasilian armour | Defense +48 |
| Posh waistcoat | Defense +48 |
| Silver mail | Defense +48 |
| Heavy armour | Defense +52 |
| King's coat | Defense +53 |
| Mardi garb | Defense +53 |
| Magic armour | Defense +55 |
| Dragon mail | Defense +60 |
| Emperor's attire | Defense +61 |
| Platinum mail | Defense +63 |
| Brigandine | Defense +66 |
| Twinkling tuxedo | Defense +67 |
| Spiked armour | Defense +68 |
| Liquid metal jacket | Defense +70 |
| Dancer's mail | Defense +72 |
| Metal slime armour | Defense +79 |
| Bandit mail | Defense +80 |
| Gigant armour | Defense +90 |
| Liquid metal armour | Defense +97 |
| Mirror armour | Defense +98 |
| Sacred armour | Defense +100 |
| Metal king jacket | Defense +101 |
| Irwin's armour | Defense +104 |
| Erdwin's tunic | Defense +120 |
| Legendary armour | Defense +120 |
| Metal king armour | Defense +126 |
| Dragon Quest XI (S: Definitive Edition) | |
|---|---|
| Shields | Modifier(s) |
| Pot lid | Defense +2 |
| Leather shield | Defense +4 |
| Scale shield | Defense +7 |
| Silver platter | Defense +8 |
| Bronze shield | Defense +10 |
| Gold platter | Defense +12 |
| Iron shield | Defense +15 |
| Light shield | Defense +17 |
| Platinum platter | Defense +20 |
| Steel shield | Defense +22 |
| White shield | Defense +24 |
| Platinum shield | Defense +25 |
| Magic shield | Defense +27 |
| Dragon shield | Defense +30 |
| Shield of heliodor | Defense +32 |
| Enchanted shield | Defense +33 |
| Ice shield | Defense +33 |
| Ethereal shield | Defense +36 |
| Warrior's shield | Defense +37 |
| Dark shield | Defense +38 |
| Metal slime shield | Defense +39 |
| Flame shield | Defense +40 |
| Liquid metal shield | Defense +44 |
| Brain drainer | Defense +45 |
| Ogre shield | Defense +45 |
| Saintess shield | Defense +46 |
| Silver shield | Defense +51 |
| Psyche swiper | Defense +52 |
| Ruinous shield | Defense +52 |
| Devilry drinker | Defense +63 |
| Goddess shield | Defense +64 |
| Soul sucker | Defense +73 |
| Erdwin's shield | Defense +74 |
| Metal king shield | Defense +75 |
| Dragon Quest XI (S: Definitive Edition) | |
|---|---|
| Accessories | Modifier(s) |
| Aerofoil earrings | Defense +5 Charm +10 |
| Agility ring | Defense +5 Agility +17 |
| All-weather earrings | Defense +5 Charm +16 |
| Angel's sandals | Agility +25 |
| Anti-freeze earrings | Defense +5 Charm +10 |
| Archangel's boots | Defense +25 |
| Asbestos earrings | Defense +5 Charm +10 |
| Assasin | Critical +1% Defense +2 Charm +5 |
| Blackout earrings | Defense +5 Charm +16 |
| Bling-bling belt | Defense +2 Charm +11 |
| Bow tie | Defense +2 Charm +10 |
| Brainy bracer | M. Might +20 M. Mend +20 |
| Brigand's mitts | Defense +6 Deftness +32 |
| Bunny tail | Defense +7 |
| Caligae of clarity | M. Mend +20 |
| Care ring | Defense +5 |
| Carer rivière | Defense +3 |
| Catholicon ring | Defense +5 |
| Choker of riddance | Defense +3 |
| Cinderblock earrings | Defense +5 Charm +16 |
| Circle of Serendipity | Defense +5 Charm +10 |
| Concrete earrings | Defense +5 Charm +10 |
| Devil's tail | Defense +2 Agility +10 |
| Dogged collar | Defense +4 Attack +8 |
| Dragon scale | Defense +8 Attack +9 |
| Earthwyrm's eye | Defense +7 HP +16 Charm +35 |
| Elfin charm | Defense +10 |
| Freebooter's gloves | Defense +48 |
| Full moon collar | Defense +3 |
| Full moon ring | Defense +5 |
| Gemma's charm | Defense +1 |
| Gemma's eternal charm | Defense +15 |
| Gloomy gloves | Deftness +22 |
| Gold bracer | Defense +4 Charm +6 |
| Gold chain | Defense +1 HP +5 Charm +5 |
| Gold ring | Defense +5 Charm +8 |
| Gold rosary | M. Might +5 M. Mend +5 |
| Guru's gloves | M. Might +17 M. Mend +17 Deftness +40 |
| Healer | Defense +2 Charm +5 |
| Holy talisman | Defense +5 |
| Life bracer | Defense +3 HP +30 |
| Life ring | Defense +5 HP +5 |
| Lucky dragon's wing | Defense +7 |
| Meteorite bracer | Defense +100 |
| Mighty armlet | Attack +15 |
| Minister's mitts | M. Mend +20 Deftness +48 |
| Mirror earrings | Defense +5 Charm +10 |
| Monarch mark | Defense +10 M. Might +30 M. Mend +30 |
| Murky mittens | Deftness +32 |
| Mystic | Defense +2 Charm +5 |
| Necklace of immunity | Defense +3 |
| Ogler's digest | Defense +1 |
| Papillon pendant | Defense +3 HP +10 MP +10 |
| Pink pearl ring | Defense +5 MP +10 Charm +10 |
| Prayer ring | Defense +5 Charm +10 |
| Protective pendant | Defense +3 |
| Ring of clarity | Defense +5 |
| Ring of immunity | Defense +5 |
| Ring of riddance | Defense +5 |
| Ring of truth | Defense +5 |
| Rosary | M. Mend +6 MP +8 |
| Rousing ring | Defense +5 |
| Rousing rose collar | Defense +3 |
| Rubber earrings | Defense +5 Charm +10 |
| Rubber gloves | Defense +3 Deftness +12 |
| Ruby of protection | Defense +16 |
| Safety goggles | Defense +3 |
| Scholar's specs | M. Might +15 M. Mend +15 Charm +15 |
| Shield-bearer | Block +1% Parry +1% Charm +5 Defense +10 |
| Skull ring | Defense +5 |
| Slime earrings | Defense +2 Charm +6 |
| Sorcerer's ring | Defense +5 MP +10 |
| Sorcerer's stone | M. Mend +13 M. Might +14 |
| Sovereign seal | Defense +7 Charm +35 |
| Springheel boots | Defense +25 |
| Spirit bracer | Defense +7 MP +30 |
| Star of clarity | Defense +3 |
| Strength ring | Attack +5 |
| Supplicant | Defense +2 Charm +5 |
| Titan belt | Defense +5 Attack +12 |
| Tough guy tattoo | Attack +8 |
| Torc of truth | Defense +3 |
| Traveller's hood | Defense +4 |
| Trickster | Evasion+1% Defense +2 Charm +5 |
| Utility belt | Defense +2 Deftness +15 |
| Vanguard | Defense +2 Charm +5 Agility +10 |
| Venus' tear | Defense +7 Charm +35 |
| Warlock | Defense +2 M. Might +3 M. Mend +3 Charm +5 |
| Wings of serendipity | Defense +5 Charm +20 |
| Wristorative | Defense +7 |
Shypox dialogue[edit | edit source]
In Battle:
When speaking to townsfolk:
Dragon Quest Rivals[edit | edit source]
The Luminary appears as a player avatar and is also featured on the artwork of several cards.
Super Smash Bros. Ultimate[edit | edit source]
The Hero of XI, under the name Eleven, appears as one of four Heroes, alongside the Heroes of III, IV, and VIII. He is the default Hero, and wields the Supreme Sword of Light and Erdwin's Shield.
While playing as the Hero in Classic Mode, Eleven appears as Round 2's opponent and is fought at Yggdrasil's Altar. He is allied with a tiny, female Robin wearing her red alternate costume, in reference to Veronica.
Final Fantasy Brave Exvius[edit | edit source]
As part of a collaborative series of events to commemorate Dragon Quest titles, the Luminary appeared as a summonable vision shortly after the international release of the game.
Etymology[edit | edit source]
A luminary is a person of prominence or great achievement, and the word can also be used to refer to one of the celestial bodies that gives off visible light. Specifically, this latter definition is used for the moon and sun in most astronomical discourse and in the context of XI's story it refers to the populations' reverence of Erdwin's Lantern.
Trivia[edit | edit source]
- The Luminary is the first protagonist to not be referred to as Yuusha (勇者) in promotional material nor the game itself. Instead, the title of Shujinkō (主人公) is used, which means protagonist in Japanese.
- The Luminary has some similarities with some of the heroes from previous installments:
- He comes from a lineage of previous heroes, much like the original Hero and the Prince of Midenhall.
- He sets out on his journey on his 16th birthday, similar to Erdrick. As the story advances, he is able to wield the Sword of Light, also known as Erdrick's sword in other games.
- He was born with the Mark of Light, a mark on his left hand with mysterious powers which glows in times of danger, much like Dai of Dragon Quest: The Adventure of Dai (initially appears on his forehead before moving to his hand) and the Hero of Dragon Quest VII.
- His inability to advance past the second tier of explosive spells is shared by Erdrick, Solo and Dai, who are also only able to learn up to Boom.
- His family connections make him similar to both Erdrick and Eight, as well. The Luminary finds out that his father, Irwin, was a great warrior himself much like Ortega. He is also secretly a prince from the kingdom of Dundrasil as revealed by Rab, his maternal grandfather, much like Eight finding out about his royal lineage from his grandfather, Chen Mui.
- His "-splitter" series of moves are animated with the signature motion of Dai's Avan Strash, and include three techniques (Earthsplitter, Seasplitter and Skysplitter) whose Japanese names are drawn from the basic moves of the Avan school. He and his party mage Veronica can also combine their powers to cast Frizz Cracker, a spell which originated as the signature move of Dai's party mage Popp.
- In the international version of the game, there is a special costume that allows him to dress up like the Hero from VIII. The outfit was added for the S: Definitive Edition version of the game in all regions.
- He is the first Hero in the main series to have a voice actor in the English version of the games. English actor Rasmus Hardiker provides his vocal grunts in various scenes and in battle.
- In the international fan poll for Dragon Quest XI released by Japanese gaming magazine Famitsu, the Luminary was voted the third most popular male character in the game and the fifth most popular character overall, with a total of 289 votes.
- The Luminary has the same hairstyle as Android 17 of Akira Toriyama's Dragon Ball series, as well as a similar physique.
- The Luminary and his companions each represent one of the classes in Dragon Quest III. The Luminary represents the Hero.
Gallery[edit | edit source]
-
 Battle pose.
 -
 Concept art.
 -
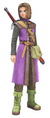 3D render.
 -
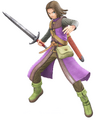 Combat pose
 -
 The Hero as an infant, being held by Chalky.
 -
 Infant Hero concept art.
 -
The Hero's height as a child.
-
 The Hero seen in Rab's vision in the S: definitive edition version.
 -
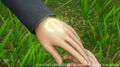 The glowing mark on the Hero's left hand.
 -
 The Hero becoming pepped up in battle.
 -
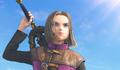 The Hero carrying the Sword of Light on his back.
 -
 "Cobblestone's finest".
 -

-
 "Daddy's boy".
 -
 "Hotto stuff".
 -
 Hotto stuff concept art.
 -

-
 "The Drasilian".
 -
 The Drasilian concept art.
 -
 "The Drasilian" S: definitive edition.
 -
 The Drasilian S concept art.
 -

-
"The fugitive".
-

-
 "Luminary of Legend".
 -
 Luminary of legend concept art.
 -

-
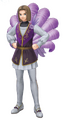 "The parade participant".
 -
 Parade participant details.
 -
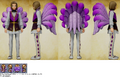
-
 "Saviour of the sands".
 -
 Saviour of the sands concept art.
 -

-
 "The Trodain".
 -

-
 The Hero's mask worn in the Octagonia tournament.
 -
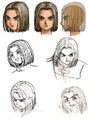 Hero's expression chart.
 -
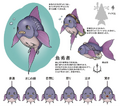 Fish expression chart.
 -
Fish concept art.
-
 Rivals artwork.
 -

-

-
 Tact artwork.
 -
 40th anniversary artwork.
 -
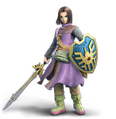 Super Smash Bros. Ultimate
 -
 XI's Hero, as seen in the splash art of "Heroic Encounters", the character trailer for the Hero in Super Smash Bros. Ultimate.


.png)
.png)


