Realm of the Mighty: Difference between revisions
Jump to navigation
Jump to search
No edit summary |
No edit summary |
||
| Line 5: | Line 5: | ||
|title = Realm of the Mighty | |title = Realm of the Mighty | ||
}} | }} | ||
The '''Realm of the Mighty''' is the final "storymode" dungeon in [[Dragon Quest IX]]. [[Palace of the Mighty]] is located on the top of | The '''Realm of the Mighty''' is the final "storymode" dungeon in [[Dragon Quest IX]]. [[Palace of the Mighty]] is located on the top of it. | ||
{{spoiler|start}} | {{spoiler|start}} | ||
It is an evil transformed version of the [[Realm of the Almighty]].<br/> | It is an evil transformed version of the [[Realm of the Almighty]].<br/> | ||
| Line 55: | Line 55: | ||
| fire = 75 | ice = 125 | wind = 100 | earth = 100 | light = 150 | dark = 50| blast = 100| drnmp = 100|petri = 25 | attract = 10 | defdown = 75 | agidown = 50 | mrdown = 75 | | fire = 75 | ice = 125 | wind = 100 | earth = 100 | light = 150 | dark = 50| blast = 100| drnmp = 100|petri = 25 | attract = 10 | defdown = 75 | agidown = 50 | mrdown = 75 | ||
|location=[[Realm of the Mighty]] - L3 | |location=[[Realm of the Mighty]] - L3 | ||
}} | }} | ||
====Mini Boss: Hootingham-Gore==== | ====Mini Boss: Hootingham-Gore==== | ||
{{NotableEnemy | {{NotableEnemy | ||
Revision as of 01:00, 29 August 2010
| Dragon Quest IX locations | |
|---|---|
| Realm of the Mighty | |
 Frontview of Realm of the Mighty |
The Realm of the Mighty is the final "storymode" dungeon in Dragon Quest IX. Palace of the Mighty is located on the top of it.
Palace of the Mighty
Palace of the Mighty is the fallen form the Temple of the Almighty. It is located on the top of Realm of the Mighty.
Monsters in the Area
| Enemy | Gold | Exp | Drop Item | Haunt |
|---|---|---|---|---|
| #185 Mandrake marshal | 140 G | 2200 |
1/64
1/128
| |
| #188 King crab | 146 G | 2800 |
1/16
1/128
| |
| #189 Genie sanguini | 96 G | 1260 |
1/64
1/128
| |
| #190 Cumulus vex | 178 G | 2300 |
1/16
1/256
| |
| #191 Red dragon | 98 G | 3000 |
1/16
1/128
| |
| #192 Gigantes | 110 G | 3200 |
1/64
1/128
| |
| #193 Belisha beakon | 104 G | 1460 |
1/32
1/128
| |
| #194 Charmour | 192 G | 2450 |
1/32
1/128
| |
| #195 Cureslime | 167 G | 1350 |
1/16
1/64
| |
| #196 Great troll | 78 G | 3800 |
1/32
1/128
| |
| #197 Cobra cardinal | 184 G | 2180 |
1/128
1/256
| |
| #198 Prism peacock | 168 G | 2300 |
1/32
1/256
| |
| #199 Night knight | 182 G | 2980 |
1/64
1/256
| |
| #200 Drakulard | 152 G | 3450 |
1/16
1/128
| |
| #201 Barbatos | 187 G | 3400 |
1/16
1/128
| |
| #202 Firn fiend | 172 G | 3200 |
1/16
1/256
| |
| #203 Sick trigertaur | 195 G | 3600 |
1/16
1/128
|


Boss Monsters
Mini Boss: Goreham-Hogg
Mini Boss: Hootingham-Gore
Mini Boss: Goresby-Purrvis
Mini Boss: Corvus
Mini Boss: Barbarus
Final Boss: Corvus 2nd form
Layout
-
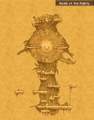 Front view
 -
 Level 1
 -
 Level 1 - inside
 -
 Basement 1
 -
 Basement 2
 -
 Level 2
 -
 Level 3
 -
 Level 4
 -
 Level 5
 -
 Level 6
 -
 Level 8 - Central room
 -
 Level 8 - East wing
 -
 Level 8 - West wing
 -
 Level 9 - West
 -
 Level 9 - East
 -
 Level 10
 -
 Level 11
 -
 Palace of the Mighty - L1
 -
 Palace of the Mighty - L2


 |
This article is a stub. You can help by expanding it. |